

Appearance
Turn your Linux device into a product you can sell
You have a Linux device that works. Maybe you designed the board, maybe it is a Raspberry Pi in an enclosure you built, and in this walkthrough it has a camera attached to it. It boots, it does the job it was built for, and you know what you want to charge for it. The hard part is everything that is not the device.
Anything that ships with a network connection now has to be cloud managed. Customers will not buy a box they cannot see from their phone, you cannot fund a site visit every time one needs looking at, and a device on someone else's network has to stay patchable for as long as you sell it. So the hardware is only the first half of the product. The second half is a SaaS platform, and building one is comfortably a six-figure programme before you sell a single unit. That is where good hardware stalls: not because the engineering is beyond you, but because shipping it means funding a software company first.
This page skips that spend. You describe the product once, install an agent on the device, create your first customer, and hand them the unit. They sign in to a portal with your name on it, open their device, and see what it is doing right now. The device only makes outbound connections, so there is no port to forward on the customer's router and no VPN to talk them through.
The attached camera is deliberate: video is the heaviest load a small Linux device can carry as a product. It wants continuous capture, bounded local storage, a live stream into somebody's browser, and playback of what happened last night. Get that working and a tank level, a pump status, or a diagnostic log is the easy version of the same path.
Work through it in one sitting and you finish with the product defined once and shipped to every unit, a device online and recording, a customer who can log in, and that device allocated to them so they can watch live and recorded video at https://silosentry.dvcmgr.com/devices. Your own organisation gets its own hosted subdomain, or a custom domain if you configure one. You still own the hardware, the pricing, the contracts, and the support promise; what you are not writing is the connection, the video delivery, and the portal.
The steps use a Raspberry Pi and an invented camera company called SiloSentry, because that path is written out in full. If there is no camera on the bench yet, the same app produces a test pattern that travels through the same recording and playback pipeline, so you can prove the whole customer journey today and fit the real sensor later.
If your device has something other than a camera attached, only Parts 1 to 3 change: you swap the example capture app for your own, which is covered in Build a class container. Everything from the customer onwards is identical, and Use the customer portal for your product walks that shorter path without any video.
Before you start
Hardware
You need a Linux host that can run the Dataplicity agent and a container runtime. A camera is optional for the first pass. The hardware used to write this walkthrough was:
- Raspberry Pi 4 or Raspberry Pi 5 (simplest documented path)
- Raspberry Pi OS 64-bit, Bookworm or newer
- official Raspberry Pi power supply
- Ethernet or reliable Wi-Fi with outbound HTTPS access
- optional for later: one CSI or USB camera and the correct cable
- a case or mount that does not sharply fold a ribbon cable, when a CSI camera is fitted
- strongly recommended for continuous recording: durable media mounted at
/mnt/dataplicity-media. An SD card is fine for proving the workflow, but it is not a long-term recording disk
Compute Module boards do not auto-detect cameras
Compute Module 5 and its siblings work on this path, but you must set the correct device-tree overlays before rpicam-hello sees anything. That trap is covered in Part 1, step 5.
Not building on a Raspberry Pi?
The product and portal steps are identical on any architecture the agent and your capture container support, and USB UVC cameras over V4L2 are the usual next stop after Pi CSI. A custom sensor, a vendor SDK, or an unusual pipeline is more work, but only on the capture side: keep the Software publishing through the local agent broker and Parts 3 to 7 do not change. To replace the example capture package with your own, see Build a class container.
If the camera is not here yet
You do not have to wait for the sensor to start selling the product:
- Skip Part 1 entirely.
- Install a container runtime in Part 2 as usual.
- In Part 3, set Capture mode to Test pattern under Camera settings.
- Run Parts 4 to 7 on colour-bar video, which exercises the same Software, device, customer, and portal steps a real camera uses.
When the hardware arrives, come back to Part 1 and change Capture mode to automatic detection, Raspberry Pi CSI, or USB / V4L2.

Account access
Ask an Organisation Administrator to confirm you can:
- create a Device Class under Engineering > Device classes
- open the class Software, UI Components, and UI Designer tabs
- open Customer journey > Customer Portal
- open Customer journey > Customers
- provision devices with the current management-plane installer
If any of those surfaces are missing, stop and enable the required product access before continuing. See Use the customer portal for your product for the full access checklist.
Pick a camera
| Camera | Best use | Connection |
|---|---|---|
| Camera Module 3 | Best default; autofocus, standard or wide view | CSI ribbon |
| Camera Module 3 NoIR | Night scenes with a suitable IR illuminator | CSI ribbon |
| HQ Camera | Long range or a deliberately selected lens | CSI ribbon plus lens |
| Global Shutter Camera | Fast machinery, gates, belts, or vehicles | CSI ribbon plus lens |
| Camera Module 2 | Low-cost, fixed-focus installations | CSI ribbon |
| Camera Module 1 | Existing legacy installations | CSI ribbon |
| USB UVC webcam | Fastest lab proof with the V4L2 path | USB; usually /dev/video0 |
For privacy in this walkthrough, aim or crop the camera so private areas are never captured. Browser rectangles and CSS overlays are not privacy masks: the unmasked recording would still exist. Software privacy masks are not yet a product setting on the camera example Software.
Part 1: Wire the camera (Raspberry Pi example)
Starting with the test pattern?
Skip this part. Go to Part 2, then set Capture mode to Test pattern in Part 3.
On hardware that is not a Raspberry Pi, treat this part as the shape of the job rather than the exact commands. Prove the operating system can see the camera and capture one frame locally before you involve Dataplicity at all, then pick the matching Capture mode in Part 3 or adapt the Software to your own pipeline.
1. Shut down completely
bash
sudo poweroffWait for activity LEDs to stop, disconnect power, and earth yourself before touching the camera PCB.
2. Use the correct cable
- Raspberry Pi 4 and earlier flagship boards use a standard 15-pin connector.
- Raspberry Pi 5 and all Pi Zero models use the smaller 22-pin connector on the Pi end.
- Official camera boards use the standard 15-pin connector at the camera end.
For a Pi 5, use a Standard-Mini camera cable.
3. Seat the ribbon
- Open the connector flap gently.
- Insert the ribbon straight and fully.
- At the Pi, the metallic contacts face away from the connector flap.
- At the camera, the metallic contacts face toward the camera board.
- Close the flap evenly. Do not sharply crease the ribbon.
On a Pi 5, either CAM/DISP0 or CAM/DISP1 can be used.
4. Boot and update
Reconnect power, sign in, then run:
bash
sudo apt update
sudo apt full-upgrade -y
sudo rebootAfter reconnecting:
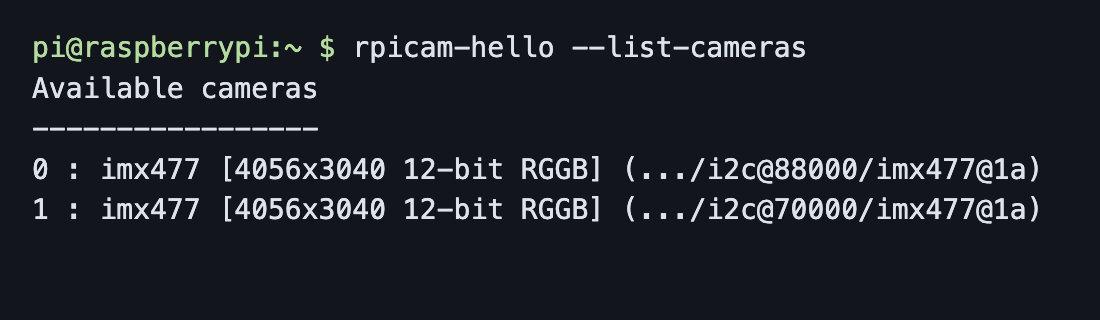
bash
rpicam-hello --list-camerasYou should see a numbered sensor such as imx708, imx219, imx477, imx296, or imx500.
Capture one headless test image:
bash
rpicam-still -n -o "$HOME/camera-test.jpg"
ls -lh "$HOME/camera-test.jpg"Do not continue with a CSI camera until the file exists and has a non-zero size.
5. Compute Module boards: set the camera overlay
On a normal Raspberry Pi 4 or 5, camera_auto_detect=1 usually finds official CSI cameras. Compute Module boards do not auto-detect cameras. If rpicam-hello --list-cameras reports "No cameras available" while the ribbon and jumpers look correct, the firmware overlay is almost certainly wrong or missing.
Edit /boot/firmware/config.txt (or /boot/config.txt on older images):
- Disable autodetection:
text
camera_auto_detect=0- Add an overlay for each camera port you are using. Match the sensor, not the marketing name:
| Camera | Overlay |
|---|---|
| Camera Module 3 / Module 3 NoIR | imx708 |
| HQ Camera | imx477 |
| Camera Module 2 | imx219 |
| Global Shutter Camera | imx296 |
| AI Camera | imx500 |
Example for two HQ cameras on a CM5 IO board:
text
camera_auto_detect=0
dtoverlay=imx477,cam0
dtoverlay=imx477,cam1- On the CM5 IO board, confirm the CAM/DISP 1 jumpers are fitted when using the second camera connector.
- Reboot, then run
rpicam-hello --list-camerasagain.
Using the wrong overlay (for example imx708 on an HQ/imx477 camera) fails with I2C probe errors even when the cable and jumpers are fine. Fix the overlay before blaming Dataplicity, Docker, or the Software defaults.
If you are using a USB camera
Connect it and run:
bash
ls -l /dev/video*
ffmpeg -hide_banner -f v4l2 -list_formats all -i /dev/video0If the camera is not /dev/video0, note the correct device path.
Part 2: Prepare the device for managed Software
The camera workload runs as managed Software. A container runtime is required; the Dataplicity agent does not install one for you.
On Raspberry Pi OS:
bash
sudo apt install -y docker.io ffmpeg
sudo systemctl enable --now docker
sudo docker versionOn other Linux distributions, install a supported container runtime and FFmpeg with the distribution's usual packages, then confirm the runtime works before continuing.
For continuous recording, attach and mount durable media at /mnt/dataplicity-media before installing the camera Software. Confirm:
bash
findmnt /mnt/dataplicity-media
df -h /mnt/dataplicity-mediaIf this is only a short demonstration, the camera Software can fall back to storage on the root filesystem.
Part 3: Create the SiloSentry camera product
Sign in to dataplicity.com.
1. Create the Device Class
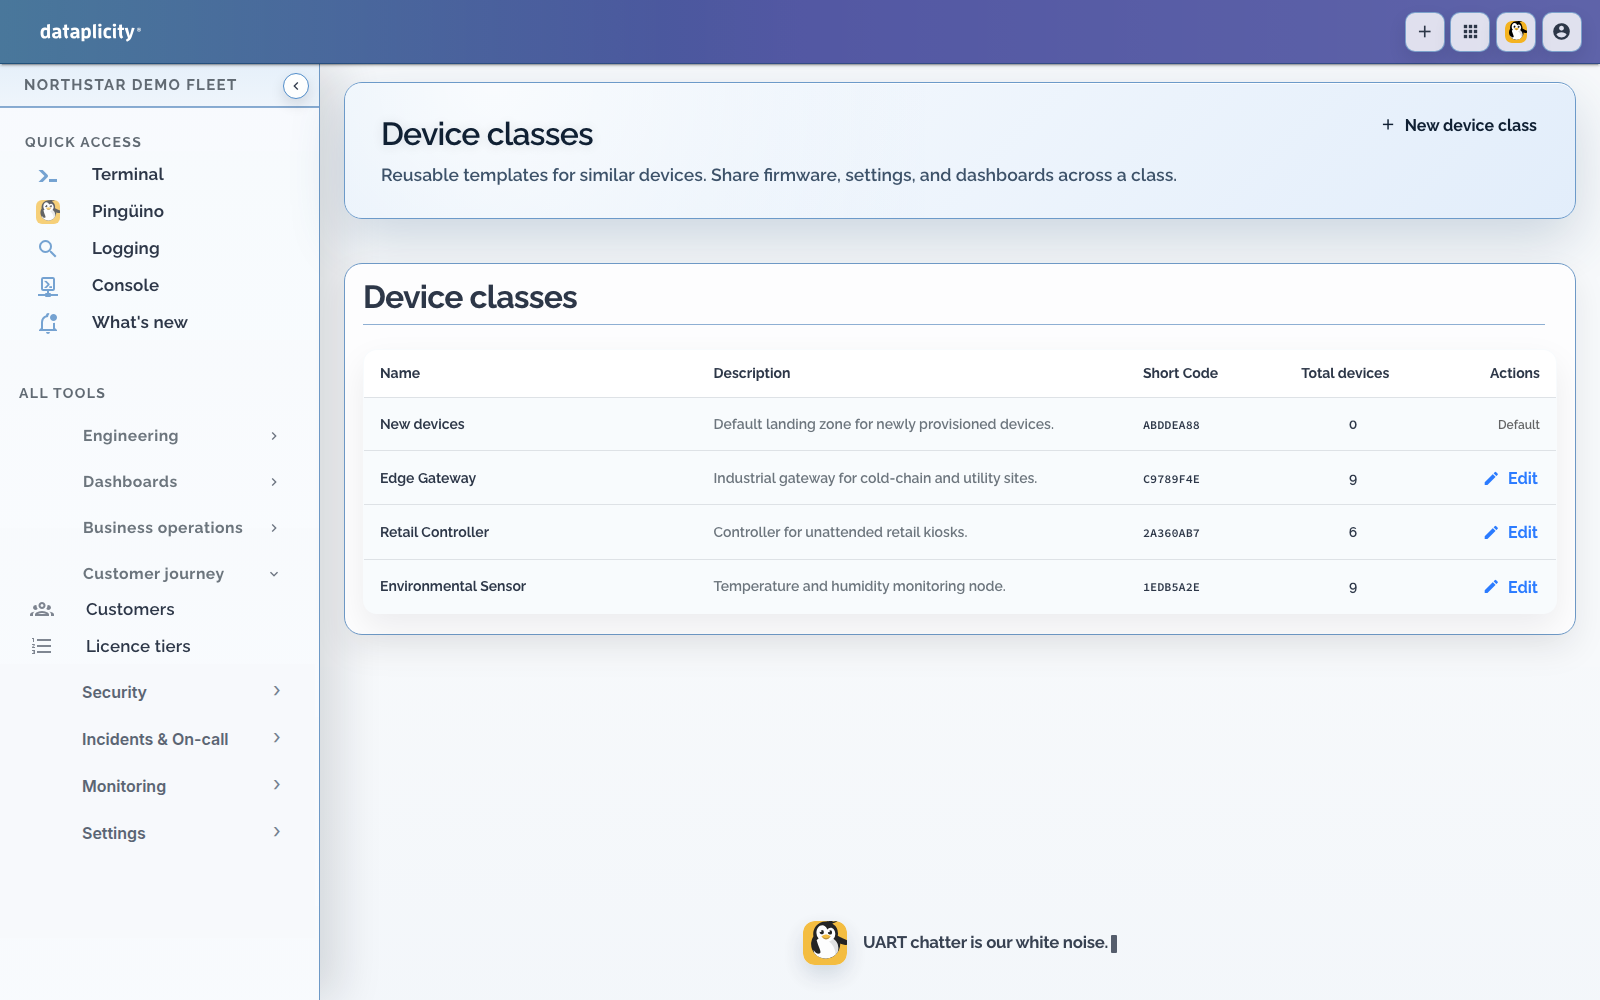
- Open Engineering > Device classes.
- Choose New device class.
- Name it
SiloSentry Camera. - Use the description
Managed customer camera with live view and recorded timeline. - Select the architecture that matches the device when choices are shown (
linux/arm64for current Raspberry Pi OS 64-bit). - Create the class.
A Device Class is the reusable product definition. The physical device becomes one instance of this product.
2. Attach the ready-made camera Software
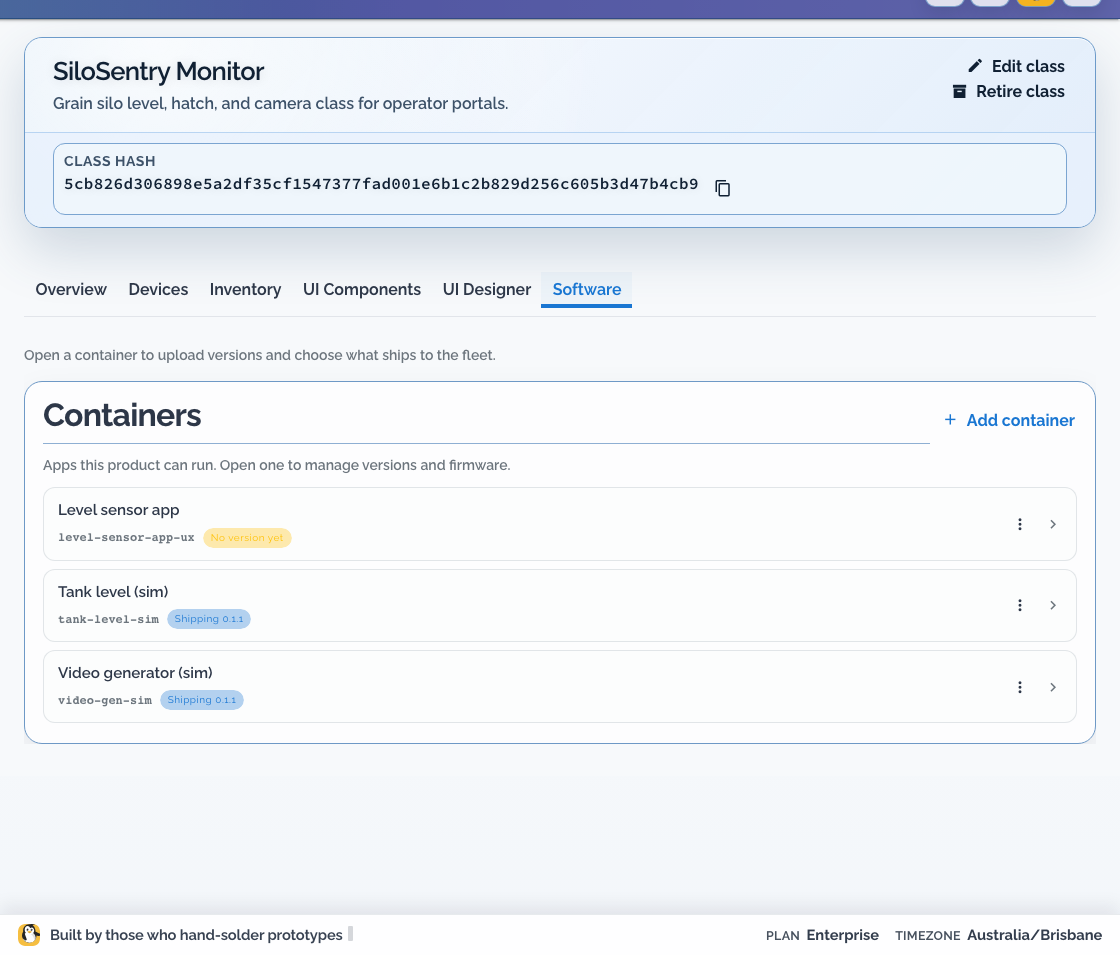
- Open SiloSentry Camera.
- Open the Software tab.
- Choose Add Software or Add container.
- Keep Use an example selected.
- Select Video generator (
video-gen-sim). - Confirm the example attach flow.
Despite its historical name, this Software supports both a safe test pattern and real CSI/V4L2 cameras. Attaching it adds:
- the
camera_videovideo stream - a customer-facing video widget
- camera events
- Start recording, Stop recording, and Rotate video actions
- a current Software bundle for the class
If the UI says that no release is available, stop: that is a publishing problem, not a Pi problem. See Example simulators.
3. Keep the safe defaults
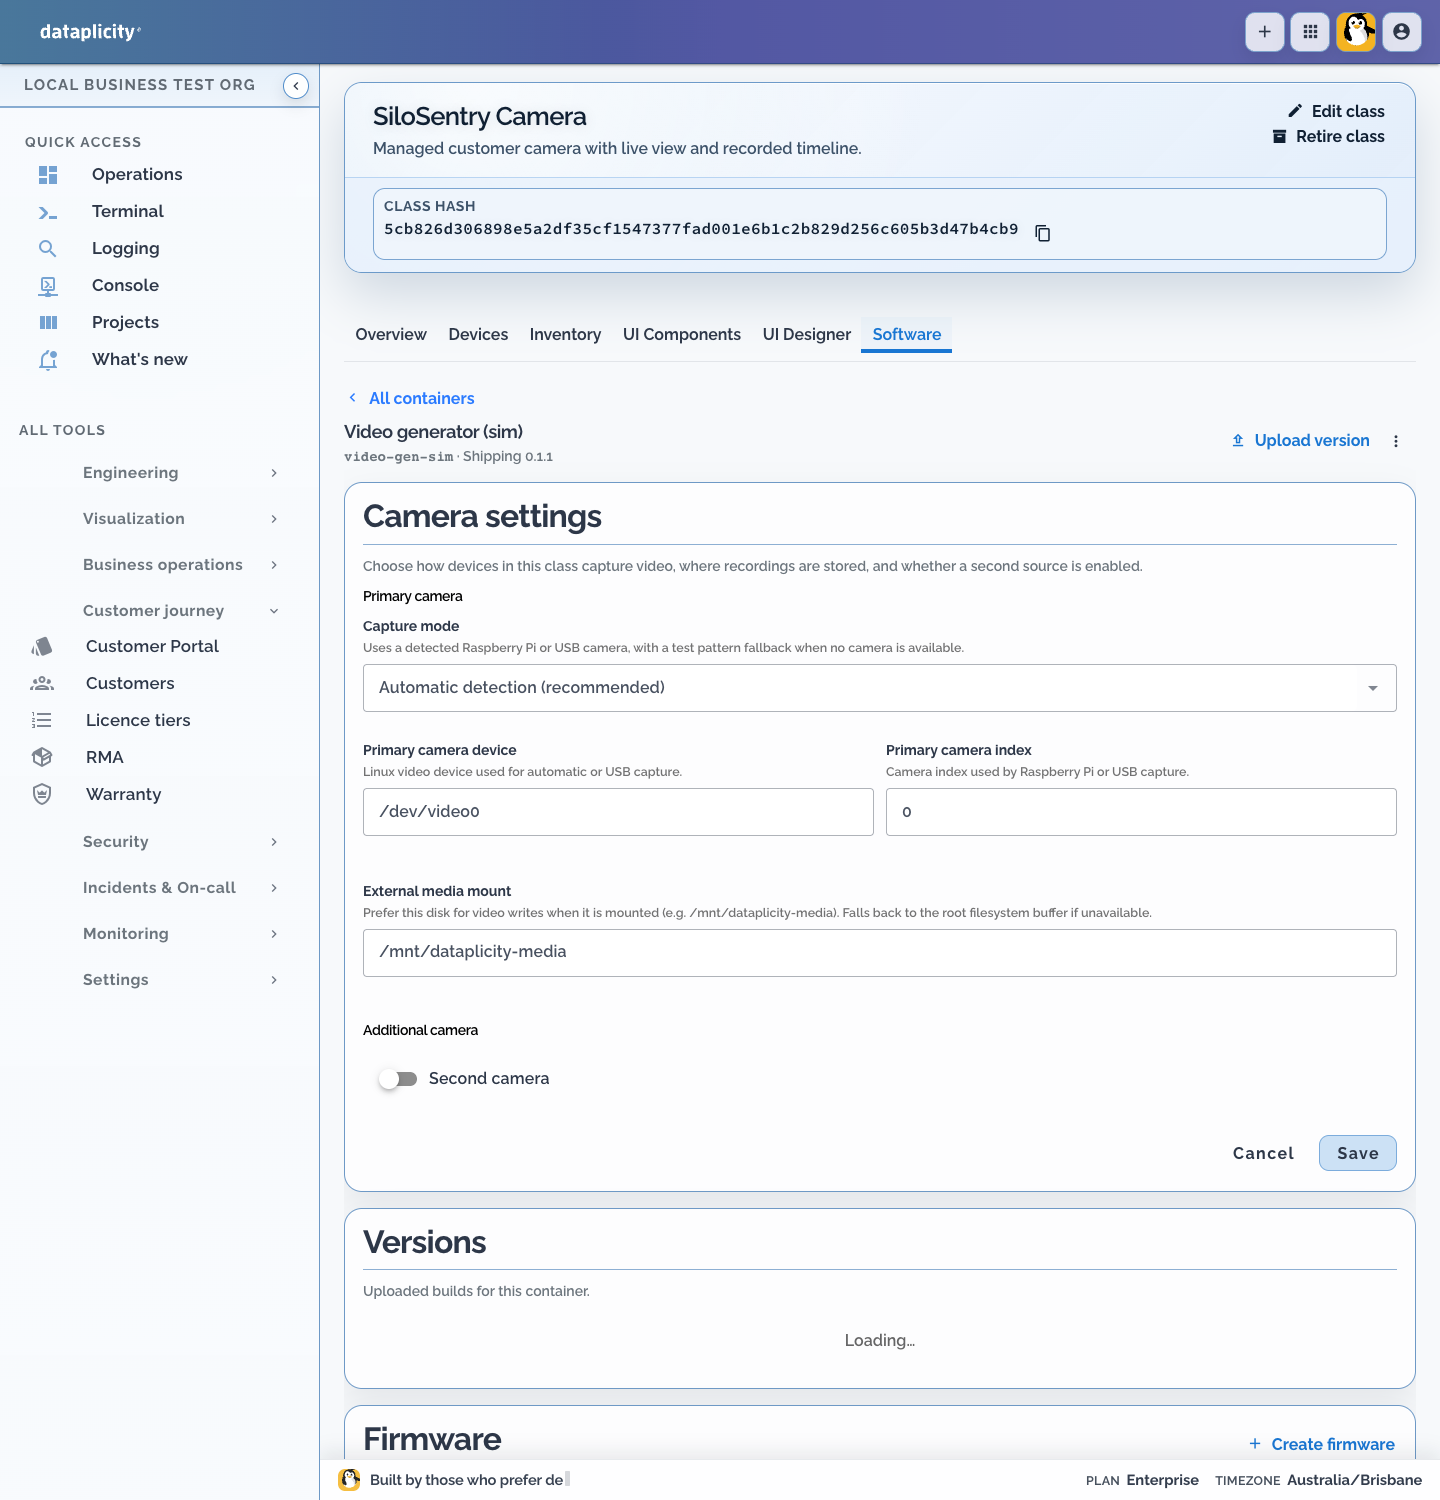
Open the attached Video generator, then find Camera settings. Only the capture settings differ between a bench run and a real sensor:
| Setting | No camera attached yet | Camera already passed Part 1 |
|---|---|---|
| Capture mode | Test pattern | Automatic detection |
| Primary camera device | not used | /dev/video0 |
| Primary camera index | not used | 0 |
Leave the rest at their defaults on either path:
| Setting | Default |
|---|---|
| External media mount | /mnt/dataplicity-media |
| Archive quality | 640 × 360 @ 10 fps |
| Live preview quality | 640 × 360 @ 6 fps |
| Capture disk ceiling | 90% of the selected filesystem |
On the test-pattern path you should see SMPTE colour bars in both live view and archive. That is expected, and it is enough to finish customer allocation and portal verification.
Automatic detection can hide a missing camera
Automatic detection tries a Raspberry Pi CSI camera first, then a USB/V4L2 camera, and falls back to colour bars when it finds neither. That fallback looks like success even when you meant to use a real sensor. Choose Test pattern when you are deliberately simulating, and choose Raspberry Pi CSI camera or USB / V4L2 camera once Part 1 has passed, so missing hardware fails visibly.
For a second camera, enable Second camera. The default source is /dev/video1, index 1. On a test-pattern-only run, leave the second camera off unless you also want a second simulated stream.
Part 4: Install Dataplicity on the Pi
1. Copy the class-specific command
- Open Engineering > Devices.
- Choose Add a new device or Add device.
- Choose SiloSentry Camera.
- Copy the current management-plane installer command, not a classic Python installer.
It has this shape:
bash
curl -fsSL https://install.dataplicity.com/install/REDACTED.sh | sudo bashTreat the installer command as a secret
The real command contains a private provisioning key. Do not paste it into tickets, screenshots, source control, or documentation.
2. Run it on the Pi
Paste the copied command into the Pi terminal and wait for it to finish. The installer registers the device into the selected class.
Always provision into the vendor organisation first. Customer portal fleet organisations intentionally cannot mint new devices; ownership changes only through the audited allocation step below.
Return to Engineering > Devices. The Add device panel polls for the new device and confirms when it connects.
3. Name and verify the device
Open the new device and rename it for the installation, for example North Yard Camera. Then check:
- device status becomes Online
- inventory reports
arm64 - a container runtime is present
video-gen-simreaches Running- the
camera_videowidget appears - a test pattern or real image reaches live view
Colour bars are correct when Capture mode is Test pattern. If you expected a real camera and see colour bars instead, the cloud path works but the Software did not select the sensor. Re-check rpicam-hello --list-cameras, /dev/video*, and the Software runtime's device access.
If the physical picture is sideways, use Rotate video. Rotation is shared by live and recorded output.
Part 5: Create the first customer
1. Confirm the SiloSentry portal
Open Customer journey > Customer Portal and confirm:
- title:
SiloSentry - hosted domain:
silosentry.dvcmgr.com - portal enabled
- logo and sign-in copy present
Open the portal once in a private browser window. A SiloSentry sign-in page should load.

2. Create the customer
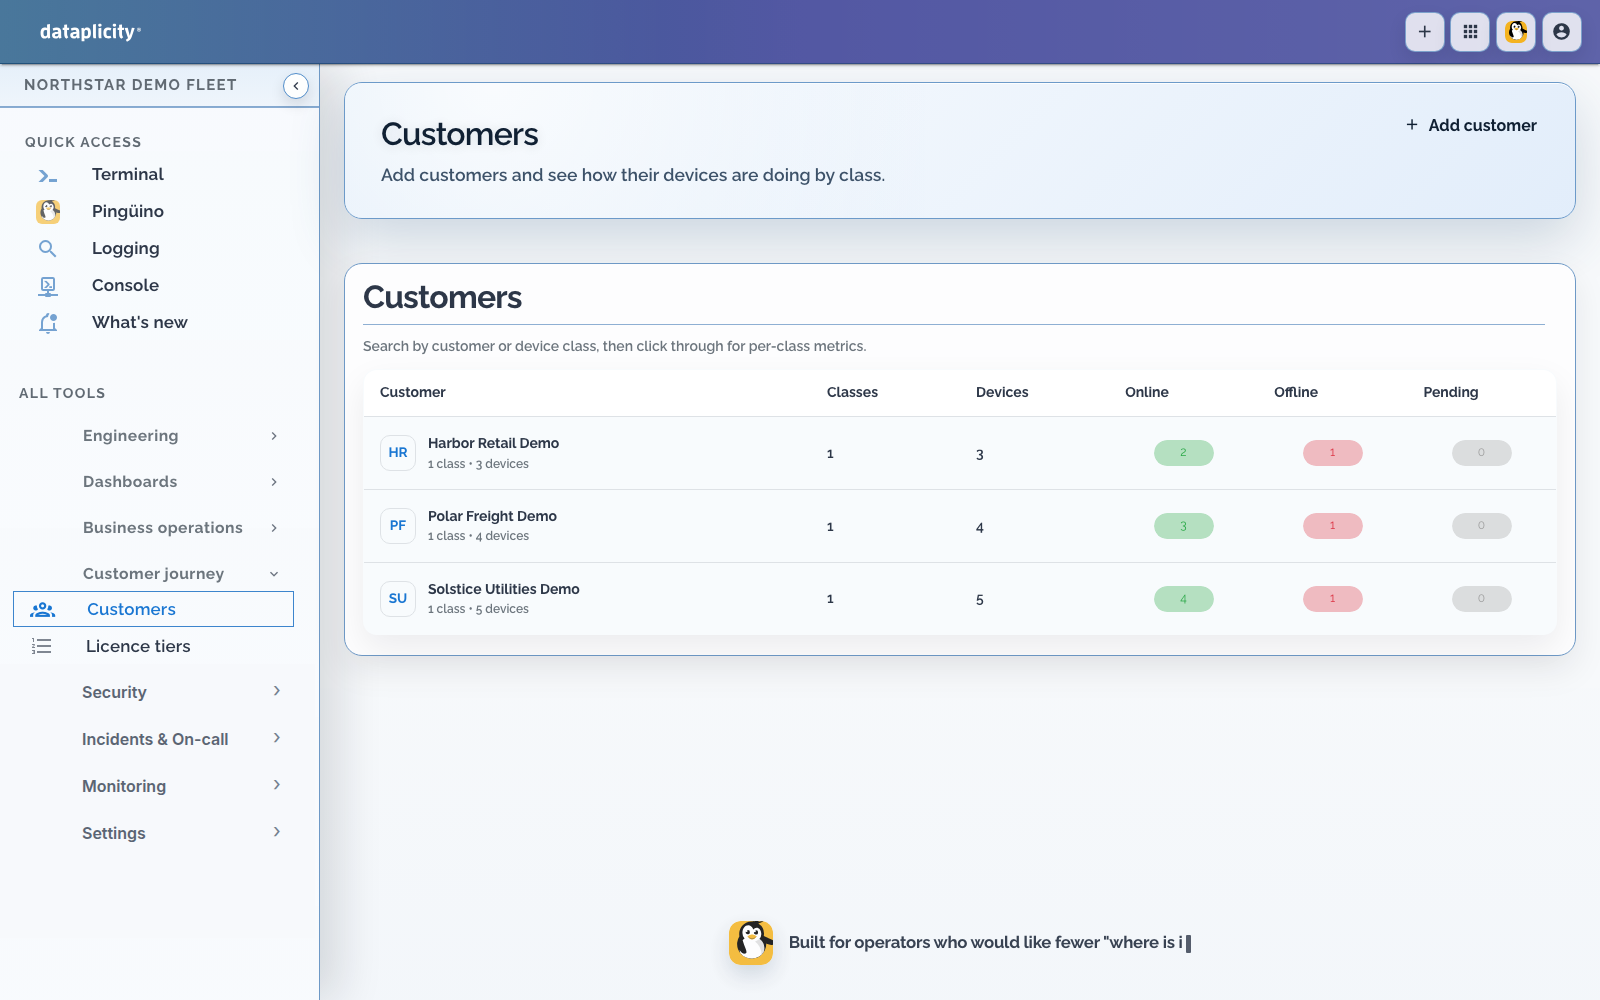
- Open Customer journey > Customers.
- Choose Create customer.
- Customer name:
Acme Farm. - Contact name: the customer's first administrator.
- Contact email: an address the customer controls.
- Select the SiloSentry portal.
- Create the customer.
The contact email cannot be the vendor operator's Dataplicity email. The customer receives a portal invitation or password-setup flow scoped to SiloSentry.
Part 6: Allocate the camera
- Return to Engineering > Devices.
- Find North Yard Camera.
- Choose Allocate to customer.
- Select Acme Farm.
- Confirm.
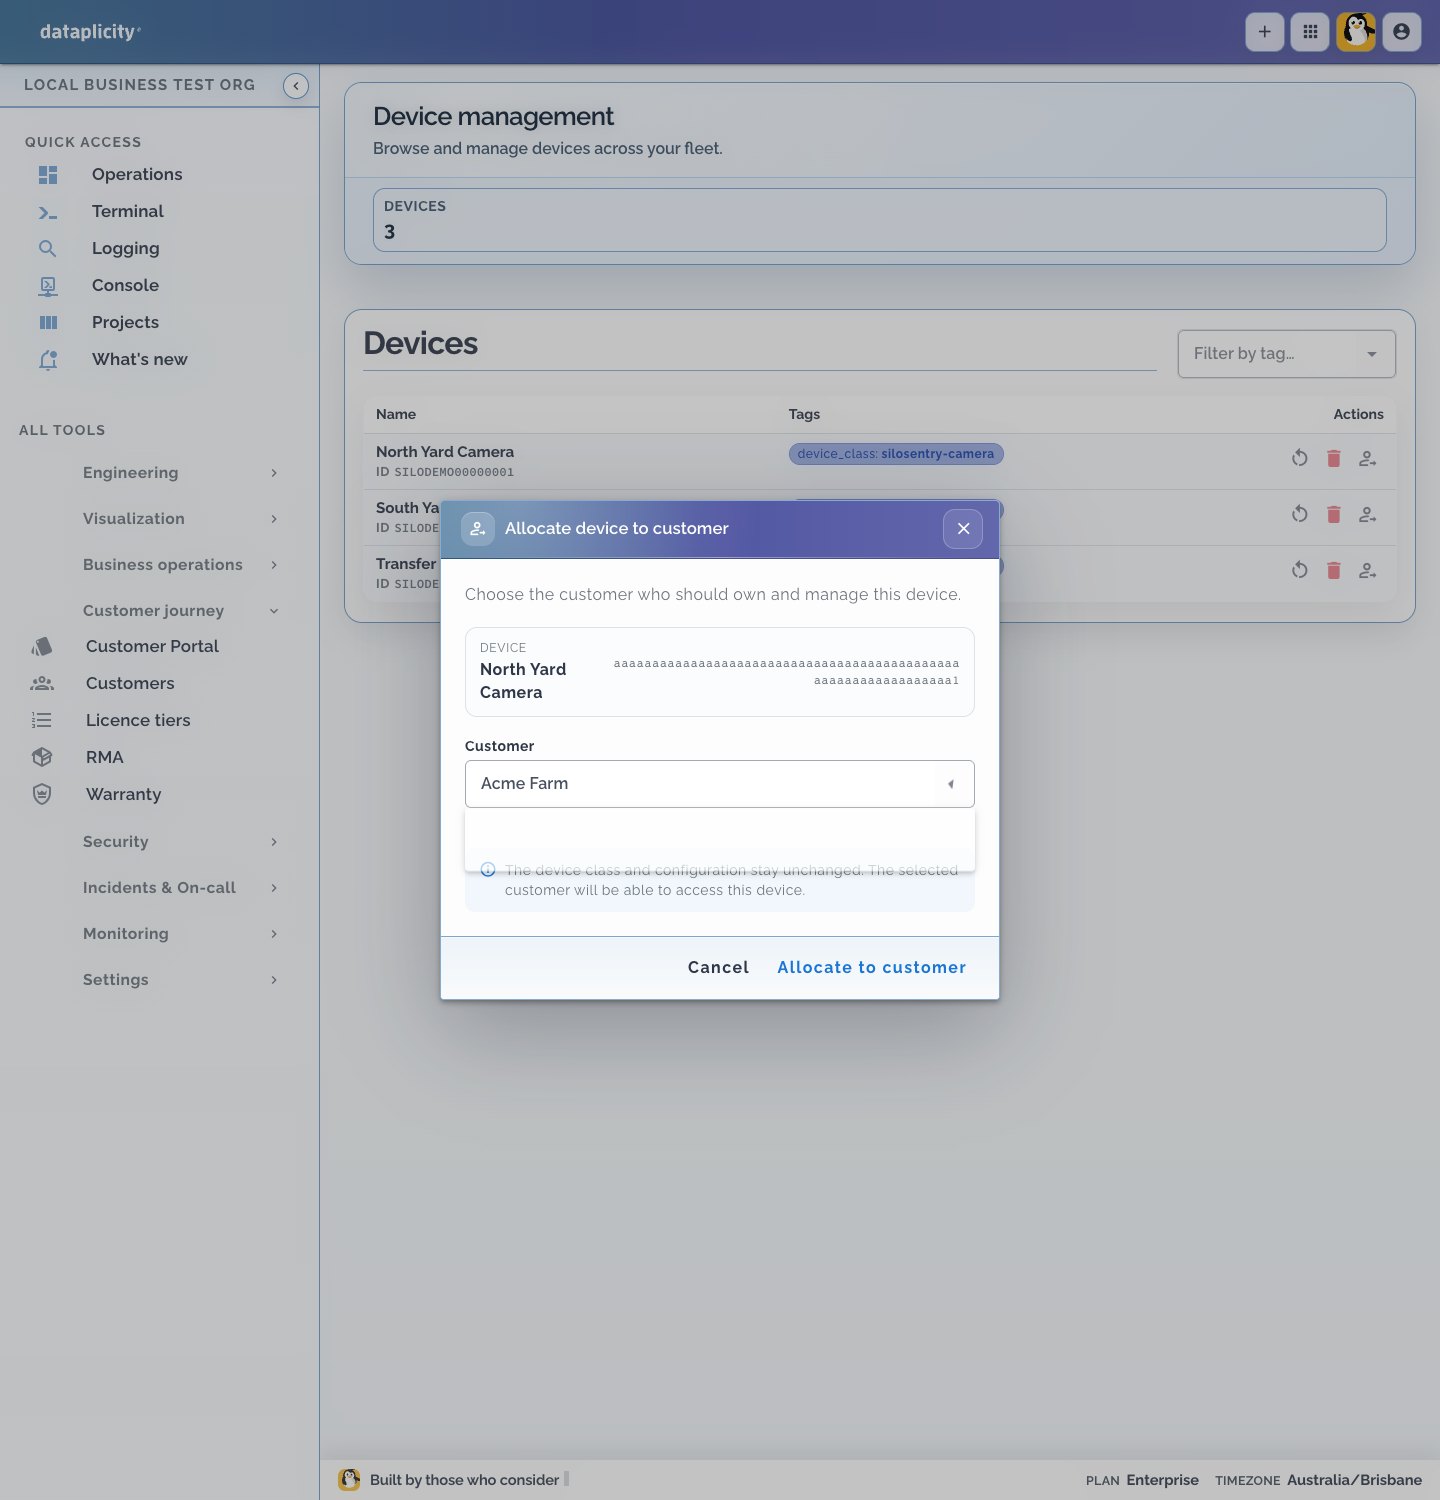
Allocation moves the device into the customer's fleet organisation while preserving its SiloSentry Camera Device Class, and the event is audited. It only changes ownership: it does not install the agent or camera Software, which is why provisioning and the real-image check happen before this step. Your staff keep support access to allocated devices only when that access is enabled for the vendor organisation, and the customer still owns the device either way.
Part 7: Verify the customer experience
Use a private browser session or a separate browser profile.
- Open
https://silosentry.dvcmgr.com/login. - Complete password setup from the customer invitation.
- Open Devices.
- Select North Yard Camera.
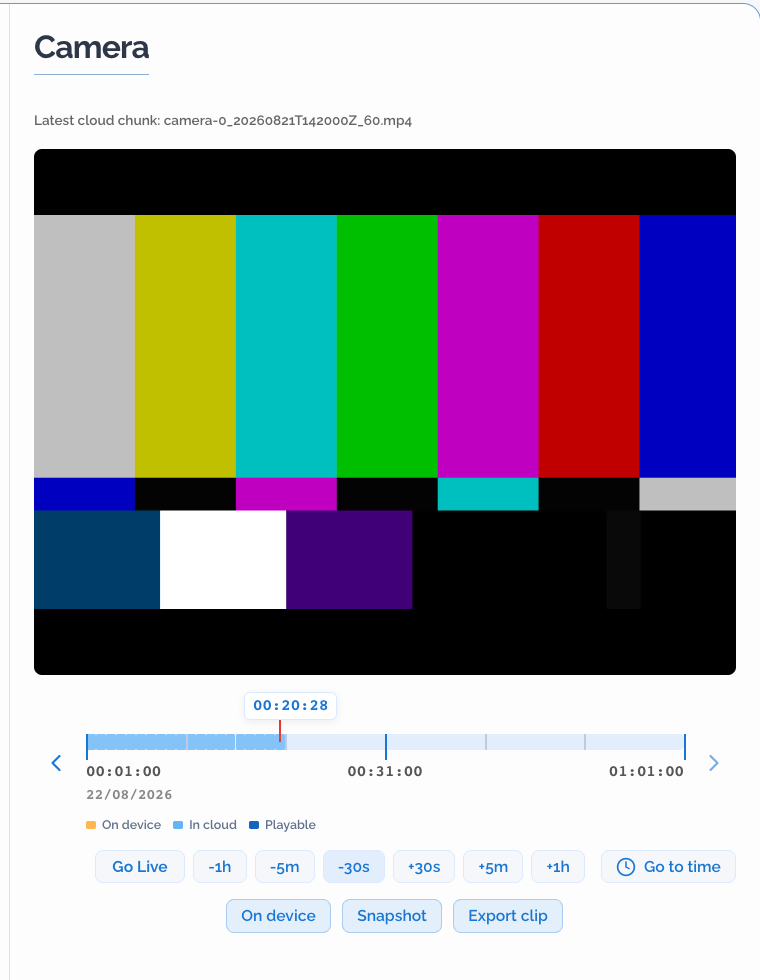
- Select Go live.
- Wait for live HLS; JPEG-over-WebSocket is the fallback while HLS warms up.
- Stop live mode and scrub backward to confirm recorded chunks.
- Test Stop recording, confirm live view continues, then Start recording.
- Rename
Camera 0to a useful installation label such asNorth gate.
The portal URLs in this example are:
| Purpose | URL |
|---|---|
| Customer device list | https://silosentry.dvcmgr.com/devices |
| A single device | https://silosentry.dvcmgr.com/devices/<device-hash> |
| Network-scoped route the portal may resolve to | https://silosentry.dvcmgr.com/networks/<network-hash>/devices/<device-hash> |
Part 8: Final handover checklist
Hardware
- camera ribbon is fully seated and strain-relieved
- enclosure, focus, field of view, and night illumination are correct
- Pi has stable power and network
- recording uses durable media rather than the root SD card
Platform
- device is Online
- camera Software is Running
- real camera image is present, not colour bars (skip this when you deliberately used Test pattern)
- live and archive both work
- disk quota is configured
- camera has a customer-friendly name
- device is allocated to the intended customer
Privacy and security
- no inbound port or public camera web server is exposed
- provisioning command has not been shared
- customer has their own portal identity
- private areas are excluded by framing or mounting, if required
- retention, access, signage, consent, and local surveillance law have been reviewed
Troubleshooting without guessing
“No cameras available”
- power off before reseating the ribbon
- verify 15-pin versus 22-pin cable
- verify contacts face the correct direction
- update Raspberry Pi OS
- run
rpicam-hello --list-camerasagain - on Compute Module boards, set
camera_auto_detect=0and the correctdtoverlay=for the sensor (see Part 1 step 5); autodetection will not save you here - if you already tried an overlay, confirm it matches the sensor (
imx477for HQ,imx708for Module 3, and so on)
The portal shows colour bars
If Capture mode is Test pattern, colour bars are the intended output. Continue verifying live HLS, archive scrub, and customer allocation.
If you expected a real camera:
- verify the camera locally
- verify the container can access the required video devices
- change Capture mode from Automatic detection or Test pattern to Raspberry Pi CSI or USB / V4L2 only after local camera detection works
Software is not running
- confirm Docker, Podman, or nerdctl exists
- confirm the attached example has a published current release for
linux/arm64 - open the device Software runtime panel for its reported error
Live works but history is empty
- wait for at least one short archive chunk and upload
- make sure recording is started
- check free space and the resolved buffer directory
- confirm the agent's video buffer is uploading
The customer cannot sign in
- use the tenant host, not the core Dataplicity login
- confirm the customer was created on the SiloSentry portal
- resend password setup
- do not reuse the vendor operator email