Control LEDs with a REST API
How to control LEDs using REST API on a Falcon web server
In this article we cover how to set up a REST API on your Pi using Python with Falcon web framework, and how to use it from any remote network to control two LEDs attached to your Pi.
This project has enormous scope for further work. The same setup will work for remotely controlled robotics, sensors, telemetry applications and Lego!
Overview
In this project we're coding with Python and using a Falcon web framework. Although not the most popular framework in Python's eco system, Falcon is very minimalist, fast and great to work with. Ideal for a project of this type.
Please ensure the following before proceeding:
- Pi is connected to the internet.
- Dataplicity is installed.
- We are logged in as Pi user.
- Port 80 is free.
Setup #1 of 2 - LEDs
Assemble your LEDs on a breadboard as shown in schematic below:

LED Schematic
Note that in this example we have chosen to connect our LEDs to pins 16 and 18 on the Raspberry Pi.
Setup #2 of 2 - Code
To get our web server set up we need to install the falcon framework for python:
sudo pip3 install falconCreate a new file called led-rest-controller.py with your favourite editor (eg nano).
sudo nano led-rest-controller.pyCopy the script below into that file.
from wsgiref.simple_server import make_server
import falcon
import json
import RPi.GPIO as GPIO


LEDS = {"green": 16, "red": 18}
GPIO.setmode(GPIO.BOARD)
GPIO.setup(LEDS["green"], GPIO.OUT)
GPIO.setup(LEDS["red"], GPIO.OUT)


def get_led_state(led_colour):

    return json.dumps({
            'active' : GPIO.input(LEDS[led_colour]),
            })

def set_led_state(led_colour, led_new_state):

    state = {'off': 0, 'on': 1}

    if not led_new_state in state:
        return json.dumps({
            'result' : 'error - incorrect state option supplied'
        })

    else:
        GPIO.output(LEDS[led_colour], state[led_new_state])
        return json.dumps({
            'result' : 'success'
        })


class helpPageResource:

    def on_get(self, req, resp):
        resp.content_type = falcon.MEDIA_TEXT
        resp.text = ('Hello! To interact with this API please use GET and PUT requests on:\n\n' +
                     req.url + '<led_colour>\n\n'
                     'Available colours:\n'
                     '    /green, /red\n'
                     'Available PUT operations on the above colours:\n'
                     '   Change of state: active=<on or off>'
                    )


class LedGreenResource:

    def on_get(self, req, resp):
        resp.text = get_led_state('green')

    def on_put(self, req, resp):
        change = json.loads(req.bounded_stream.read())
        resp.text = set_led_state('green', change['active'])


class LedRedResource:

    def on_get(self, req, resp):
        resp.text = get_led_state('red')

    def on_put(self, req, resp):
        change = json.loads(req.bounded_stream.read())
        resp.text = set_led_state('red', change['active'])


app       = falcon.App()
help_page = helpPageResource()
led_green = LedGreenResource()
led_red   = LedRedResource()

app.add_route('/',      help_page)
app.add_route('/green', led_green)
app.add_route('/red',   led_red  )


if __name__ == '__main__':

    with make_server('', 80, app) as httpd:

        print('Serving REST LED controller on Wormhole...')
        httpd.serve_forever()
How it worksThe script above:
- Configures GPIO pins 16 and 18 as outputs to match our wiring above
- Configures the main falcon application.
- Maps "routes" (allowed HTTP methods) to their corresponding functions and resources.
In this example, we are using three routes. The first "root" ("/") route responds to HTTP GET requests by serving a help page with the instructions for our API. The other two are the LED routes "/green" and "/red". They behave differently dependent on if they receive a "GET" or a "PUT" request:
- On GET: return the current state of the LED (ON or OFF)
- On PUT: change the state of the LED to ON or OFF
Run the code
To run our application simply use the following command:
sudo python3 led-rest-controller.pyControl your LEDs remotely
Having completed the steps above we're now ready to use Wormhole to interact with the app. Normally, to access our wormhole we will find its link in our device's options pane:
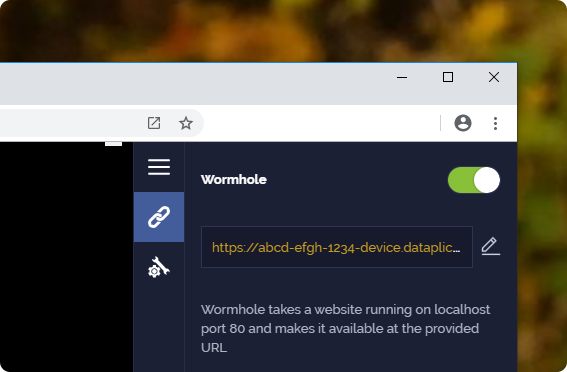
Copy your wormhole link, which will look similar to:
https://ABCD-EFGH-1234-device.dataplicity.io/Where the ABCD-EFGH-1234 part will be unique to our account and now we can start controlling the LEDs. Firstly though on our PC (running Ubuntu) we install the following package:
sudo apt install -y httpiehttpie is a great command line utility for interacting with REST APIs.
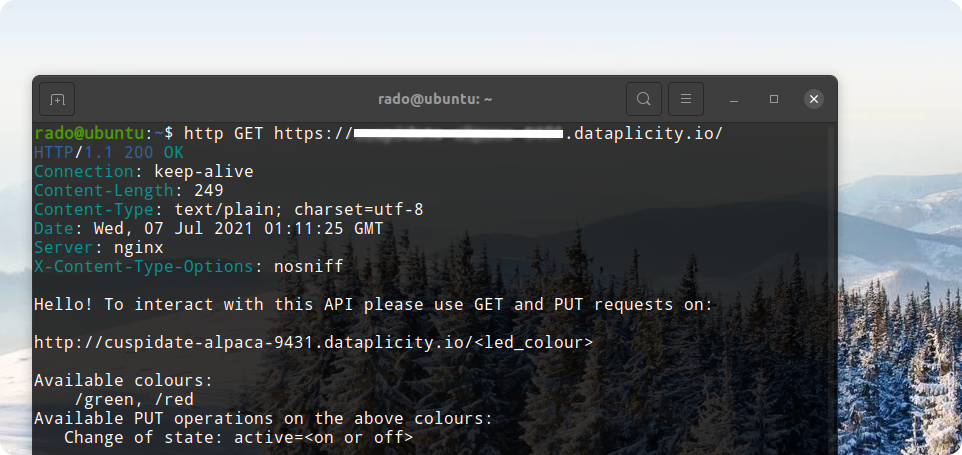
We start by checking our "help" end point. On the command line on your PC run the following:
http GET https://ABCD-EFGH-1234-device.dataplicity.io/Result:
Then we can check if our green LED is switched ON:
http GET https://ABCD-EFGH-1234-device.dataplicity.io/greenResult:
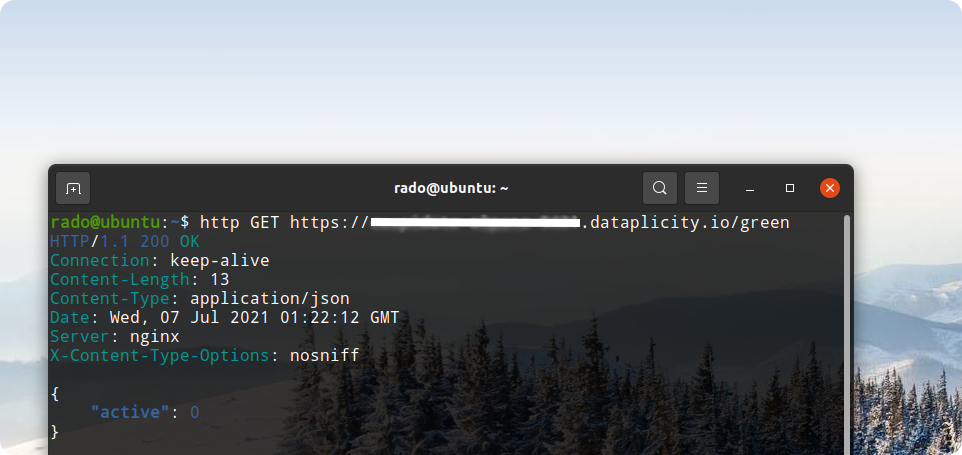
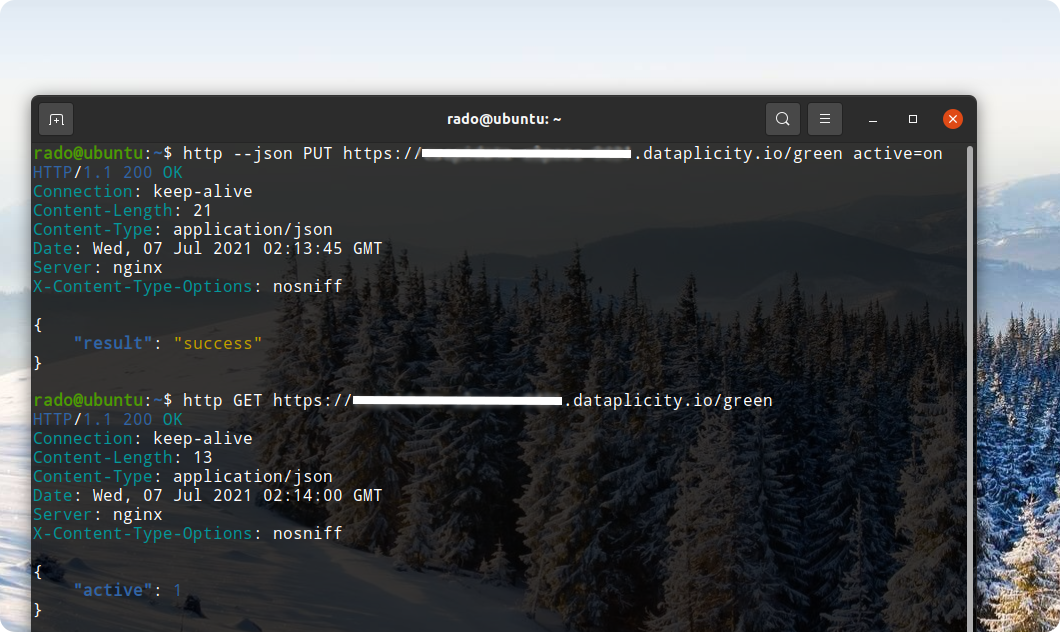
'0' means it's switched OFF. Let's switch it ON and check it again to confirm:
http --json PUT https://ABCD-EFGH-1234-device.dataplicity.io/green active=on
and of course the above operations are also applicable to the red LED as well.
What's next?
Hosting a web API via Wormhole is a fantastic way to remotely control remote applications on a Raspberry Pi. It's real time, and it works anywhere you have a viable internet connection. You could even use this method to plug your applications into your own web control system!