

Appearance
Build your own Product Application #
Give customers a branded operating surface for hardware that does not match a shipped application. This walkthrough uses the fictitious PolarVend PV-2407, a refrigerated vending machine with cabinet temperature and stock readings, operator Controls, a test-vend action, service records, and an actionable vend alert.
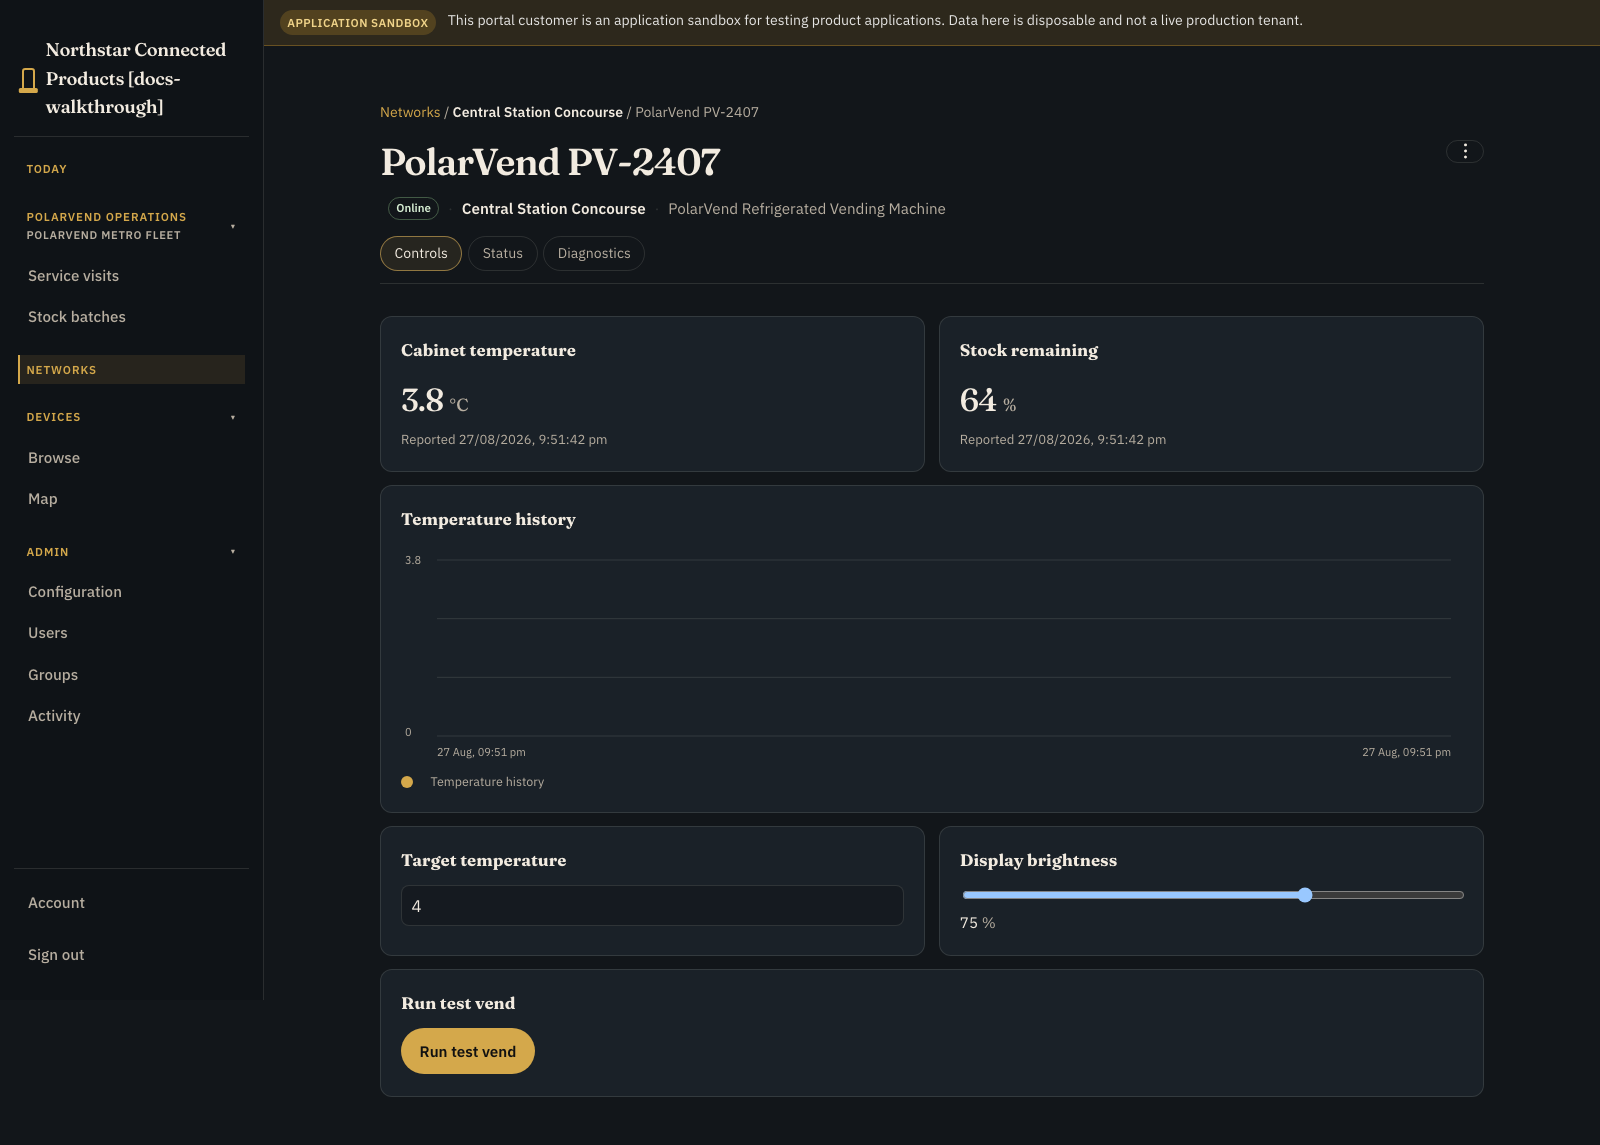
The same route works for your own device category: define its Device Class, design Controls, then build the records and workflow your customers need in a custom Product Application.
Settings delivery (agent 0.1.52+)
Device Class settings widgets store desired state in the cloud. A supporting field agent install (0.1.52+) creates /var/lib/dataplicity/config/current, runs the supervisor as dpagent, persists the desired map locally (parameters.json), exposes GET /v1/settings, and can proxy reported acknowledgements. Your device handler must still apply the value and publish reported state. See Device data and control contract.
1. Define the device I/O #
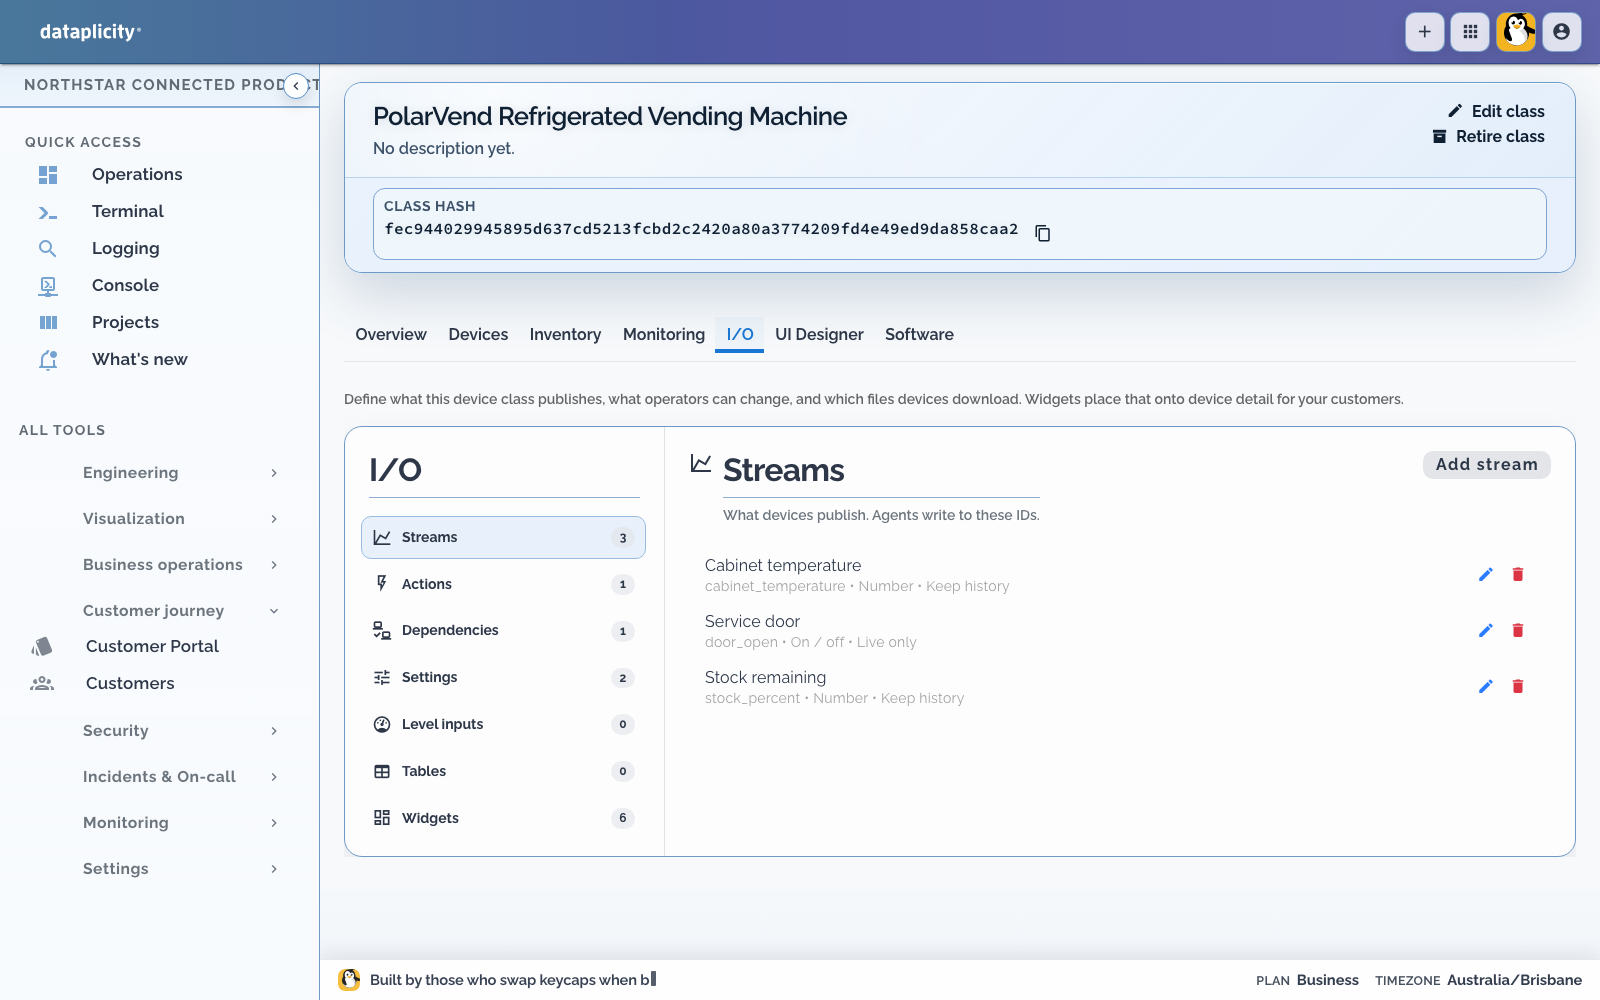
Create a PolarVend Refrigerated Vending Machine Device Class. Add the contract that every machine in this class implements:
- Cabinet temperature: metric stream in °C with retained history
- Stock remaining: metric stream in percent with retained history
- Service door: live boolean stream
- Target temperature: number setting from 1–8 °C
- Display brightness: number setting from 20–100%
- Run test vend: trigger action with operator confirmation
Use stable, machine-readable keys such as cabinet_temperature, target_temperature, and test_vend. Device software must publish streams, handle the action path for test_vend, and consume settings via GET /v1/settings (or parameters.json) then report applied values.
2. Design Controls #
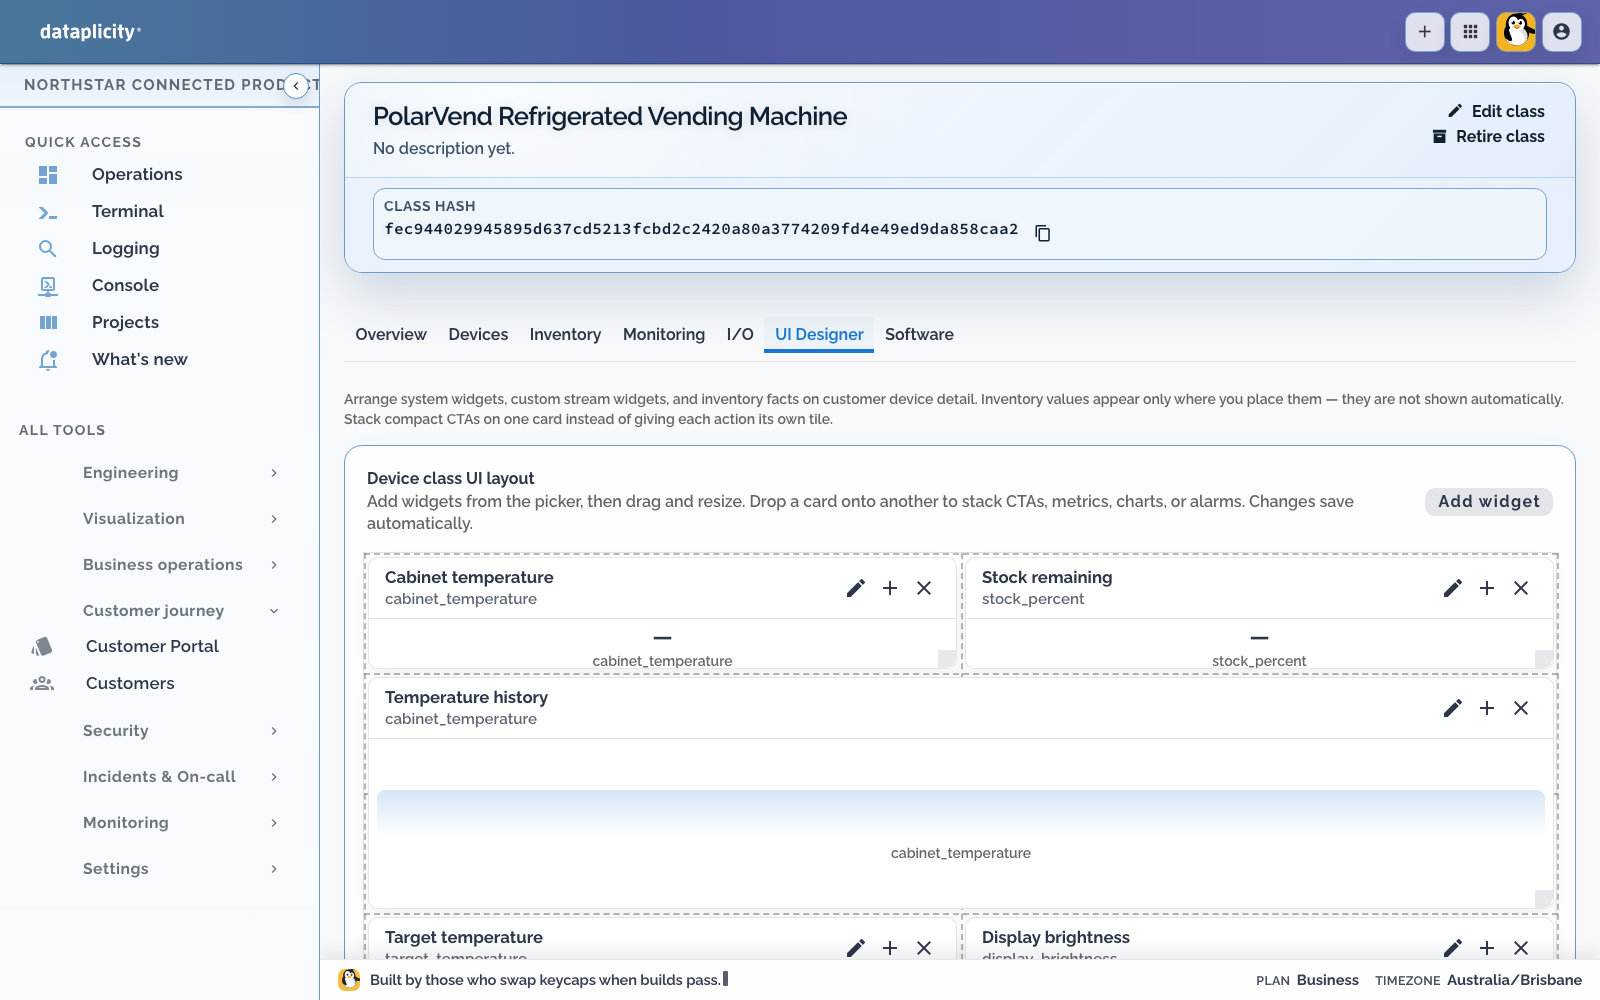
Open UI Designer and arrange the customer-facing device page:
- Put cabinet temperature and stock remaining at the top.
- Add a wide temperature-history chart.
- Place target temperature and display brightness together as settings widgets.
- Put the confirmed test-vend action last.
Keep diagnostics and product workflow separate from the controls a device operator uses frequently. Settings widgets write desired state; device software applies them locally and reports the result.
3. Create your own application #
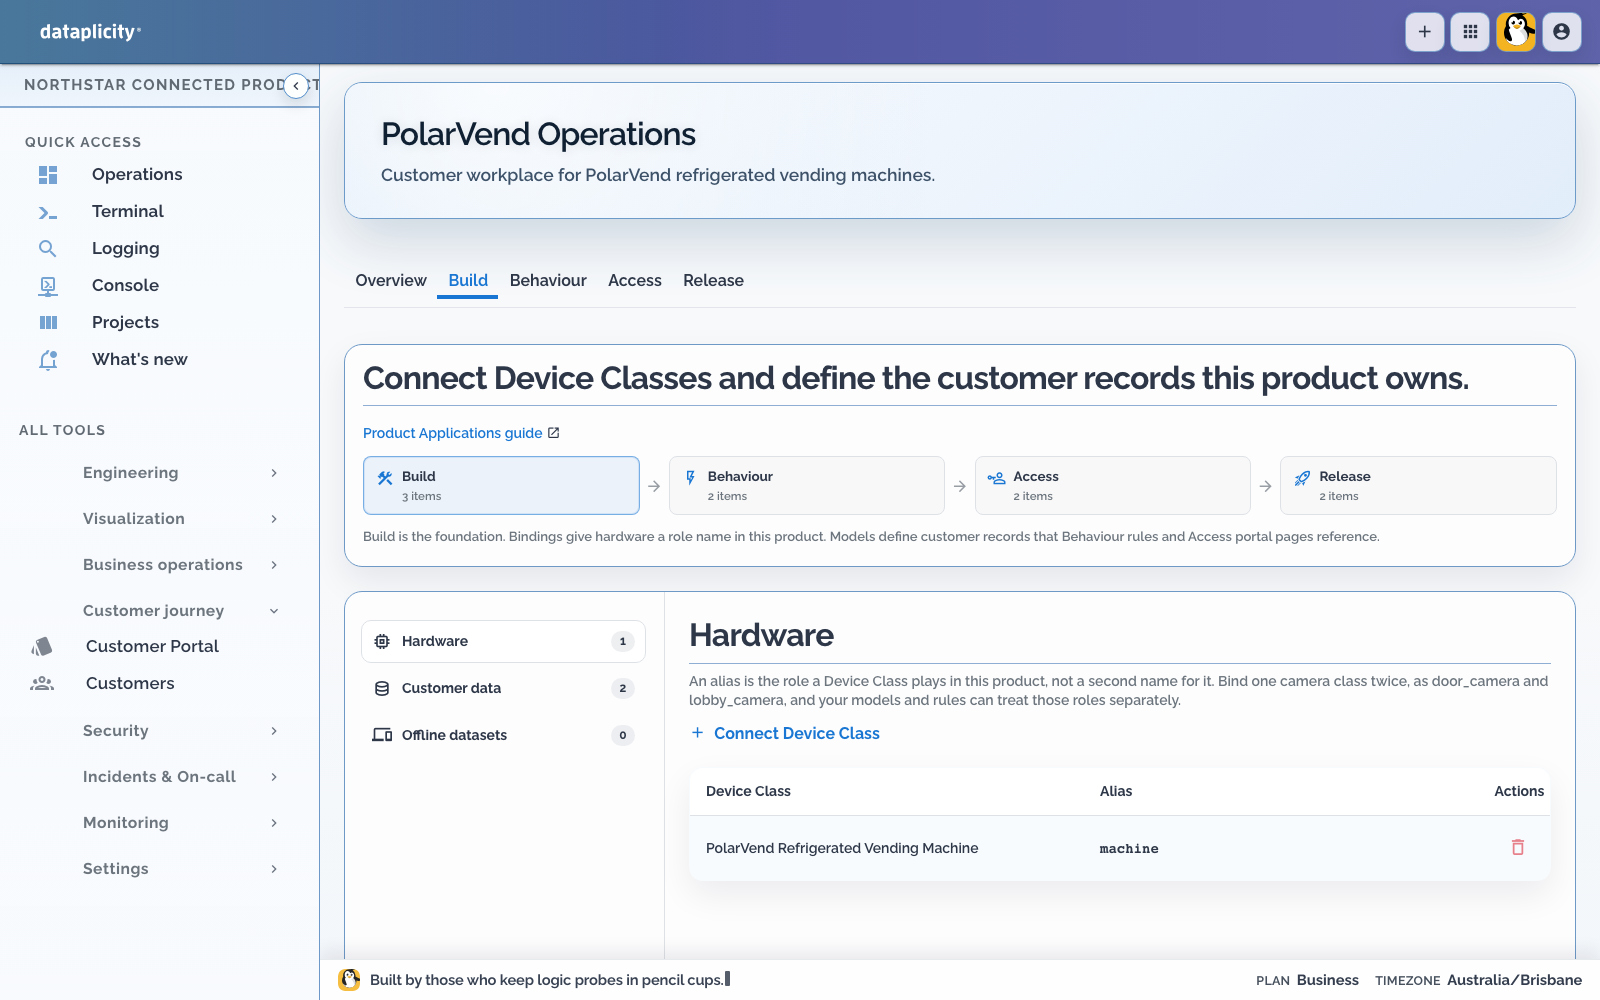
Open Developer > Applications, choose Create application, and start with an empty draft. Do not apply a starter kit for this route. The application opens in its routed workspace. Use Overview to track progress, then move between Build, Behaviour, Access, and Release without returning to the application list.
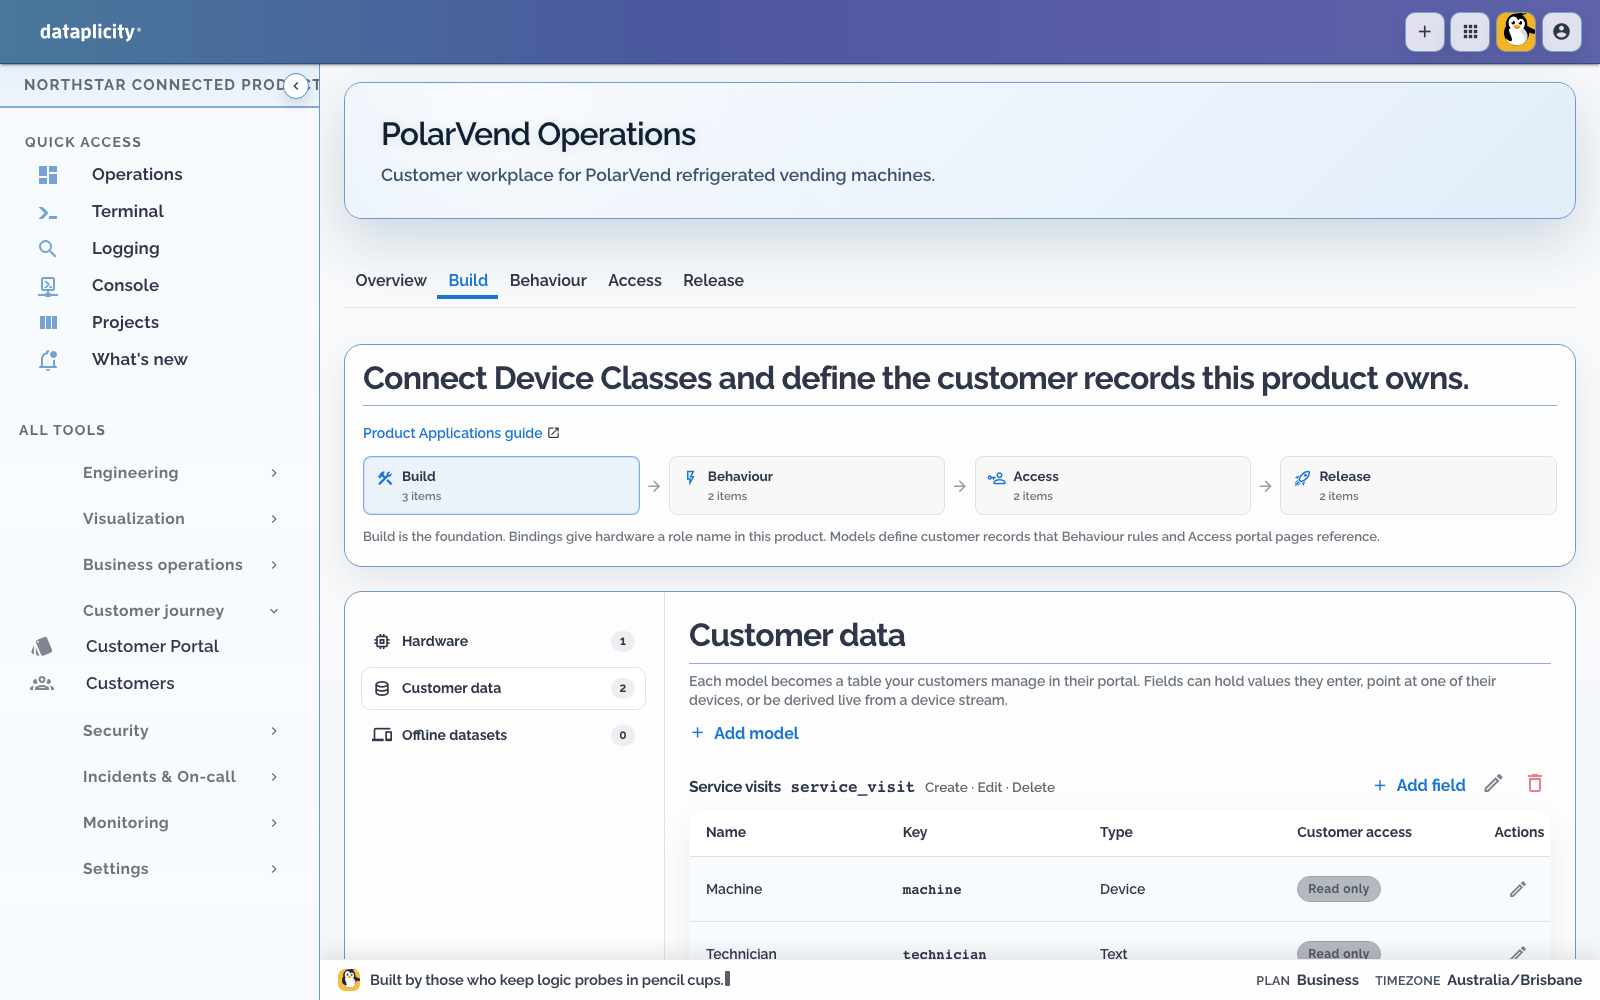
Name the application PolarVend Operations, then open Build:
- Under Hardware, connect the PolarVend Device Class as the
machinerole. - Add Service visits as a customer data model.
- Give it machine, technician, work-completed, and completed-at fields.
- Allow customer create, edit, and delete for service visits.
- Add Stock batches with machine, product-line count, and loaded-at fields.
- Add list pages for both models.
4. Add a command and customer action #
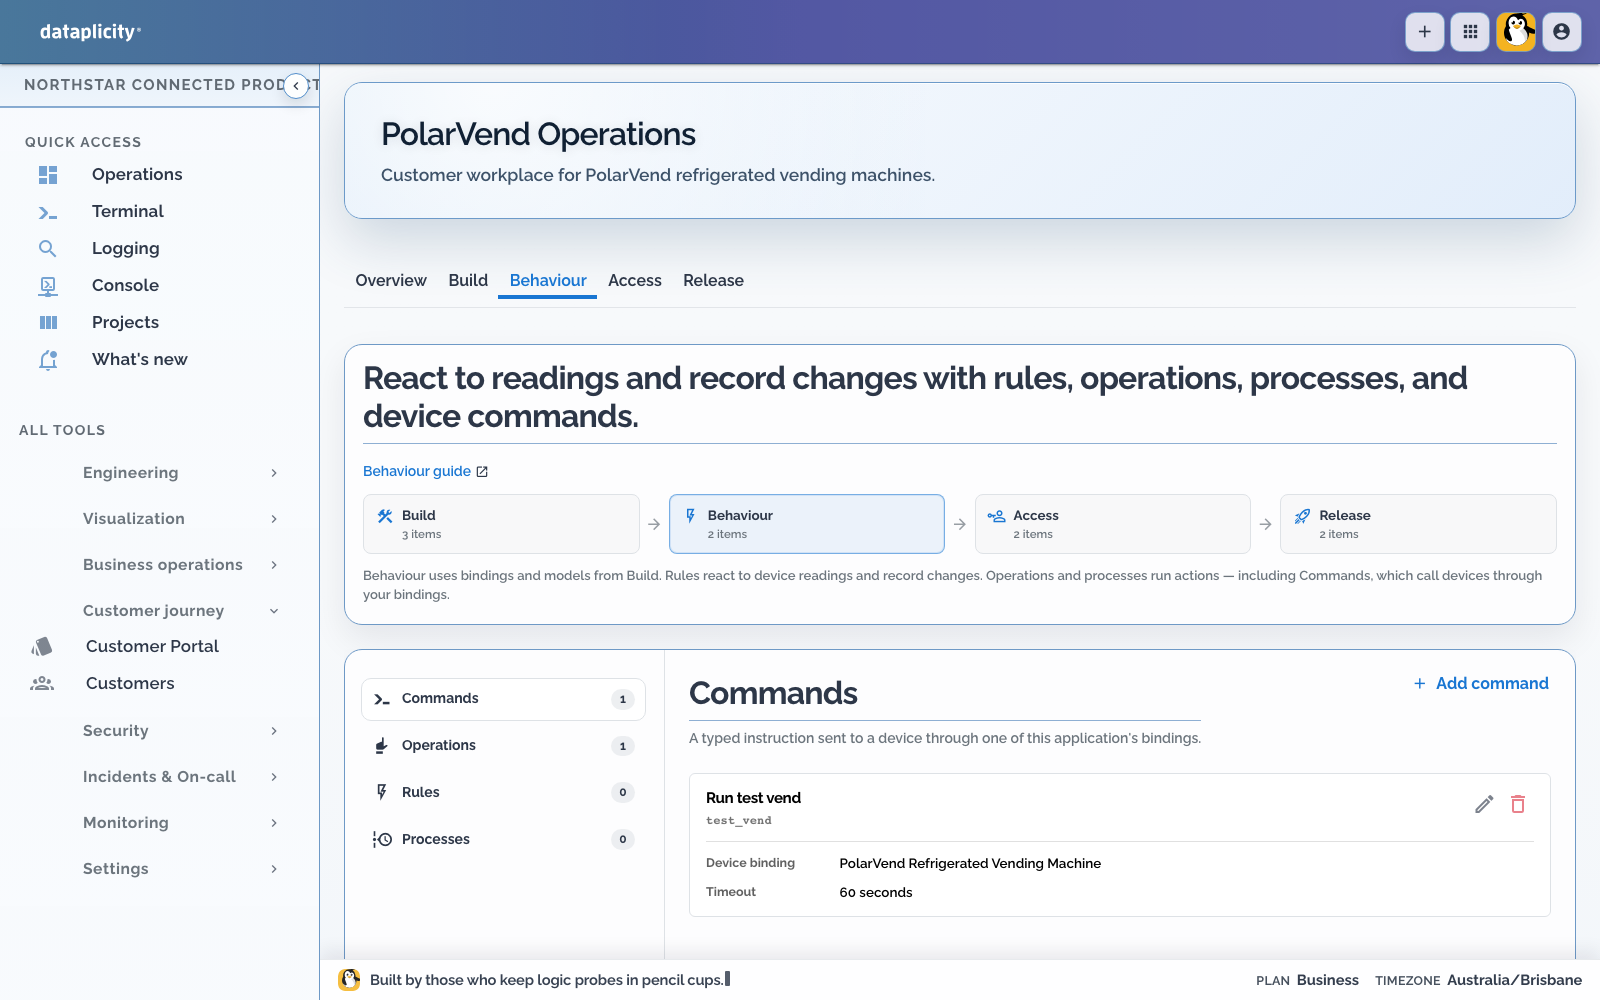
Under Behaviour > Commands, create test_vend and map it to the Device Class action with the same key. Expose a portal operation named Run test vend that asks for a machine, confirms the request, and invokes that command. If the operation grows beyond one bounded command, create it under Behaviour > Processes and use the process canvas to make waits, failure branches, and completion explicit. See Build a process and Choose process placement.
The action remains bounded by the Device Class contract; the vending-machine controller owns local safety and the physical dispense sequence.
5. Shape the Application Workspace #
Open Access > Presentation and make the customer outcome explicit. For this example, use an Overview page for current attention, a Records page for service visits and stock batches, and a Work page if operators need a queue of open service activity. Add Exceptions only when failed vends have a defined response, and add Map only when machine location is part of the operating task.
Preview the resulting Application Workspace with the intended customer role. Verify page order, empty states, record fields, process names, and which statuses require attention. See Design the Application Workspace.
6. Test, publish, and attach #
Create a sandbox customer in Release before testing customer operations. In Scenarios, save a fixture for that sandbox, run the normal test-vend path, and add a failed-command scenario if the operation uses a process. Open the process Runs tab or Executions to inspect the path, attempts, correlated activity, and any safe intervention. See Test application scenarios and Investigate process executions.
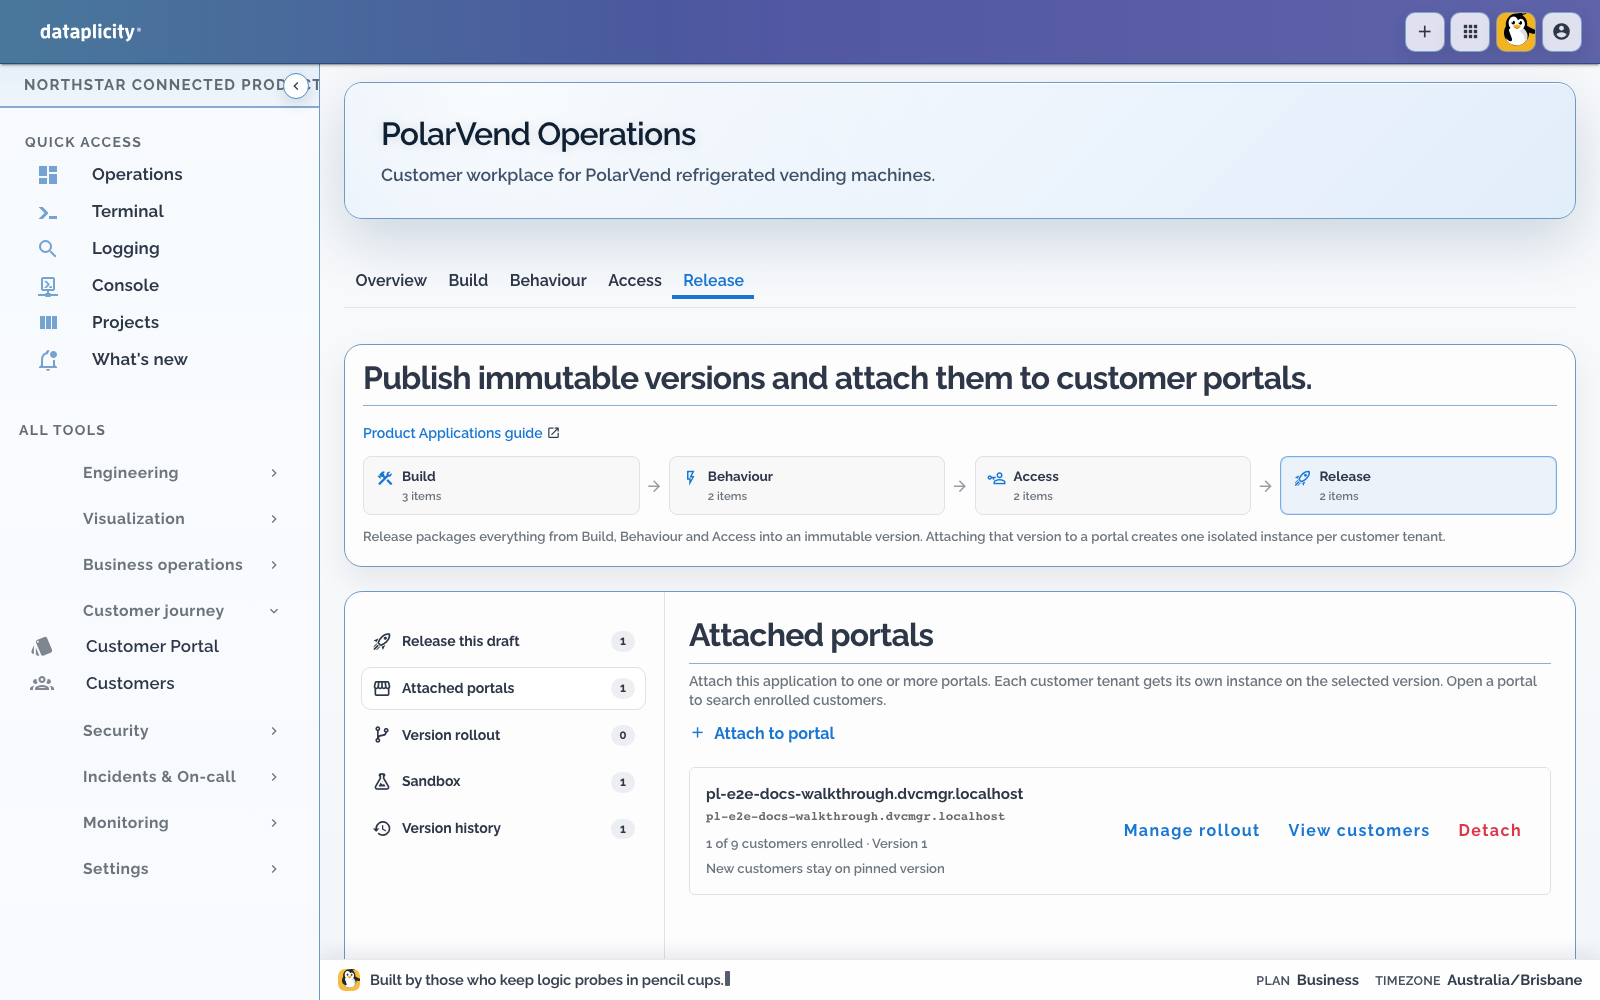
Return to Release and run preflight. Fix blocking errors. Read every warning and explicitly acknowledge each warning that requires acknowledgement; publishing remains blocked until those acknowledgements are supplied. Publish the tested release candidate as version 1, then use Attached portals to attach that version to the intended customer portal. The customer receives an isolated PolarVend application instance. See Release a Product Application.
7. Place and operate the machine #
In the customer portal:
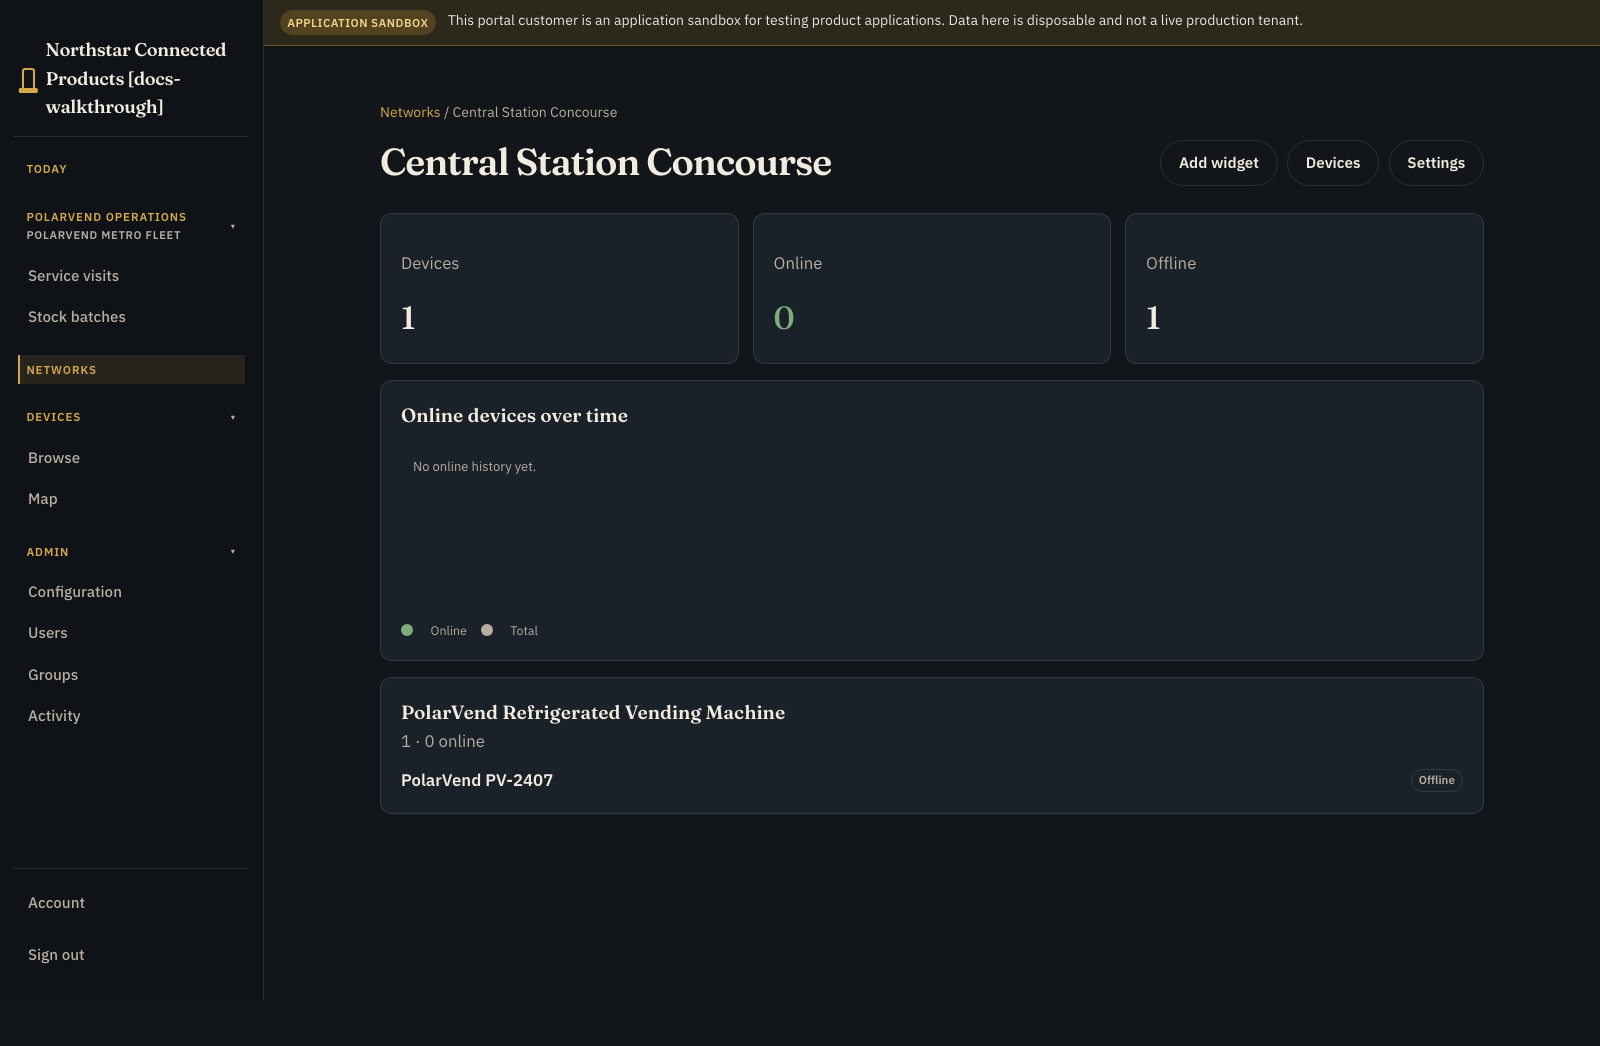
- Open Networks and create the installation place.
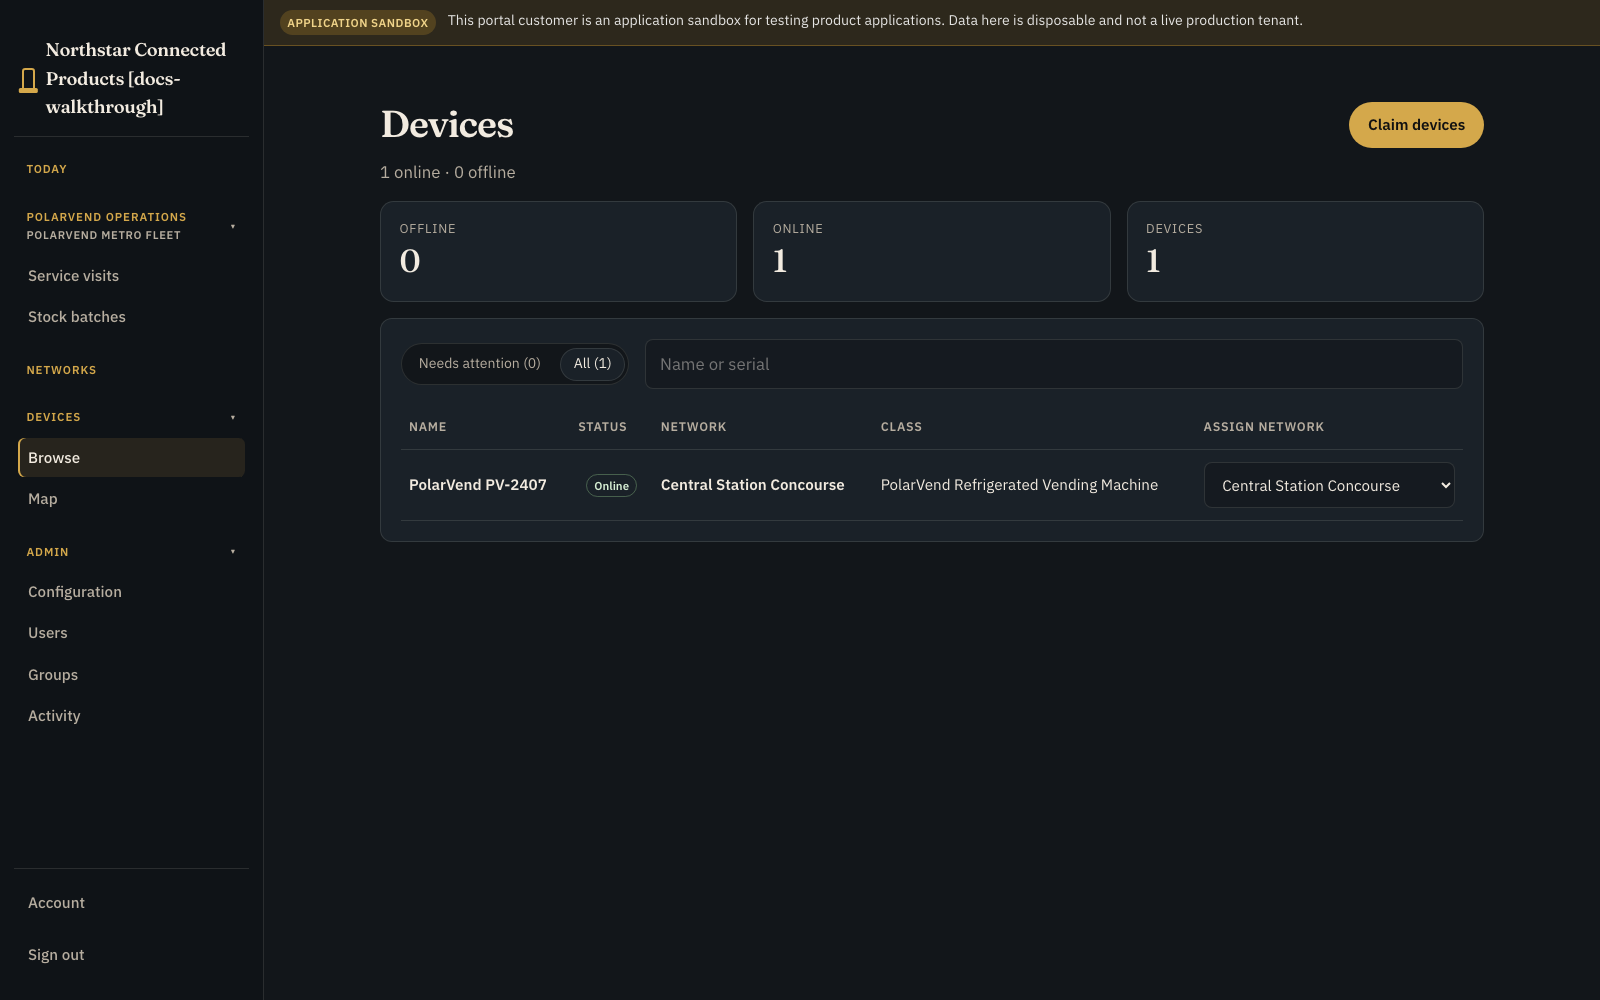
- Open Devices and assign the PolarVend machine to that network.
- Open the device and verify its class-designed Controls page.
- Open the PolarVend Application Workspace and confirm its Overview, Records, Work, Exceptions, or Map pages match the published Presentation configuration.
8. Work with alerts and records #
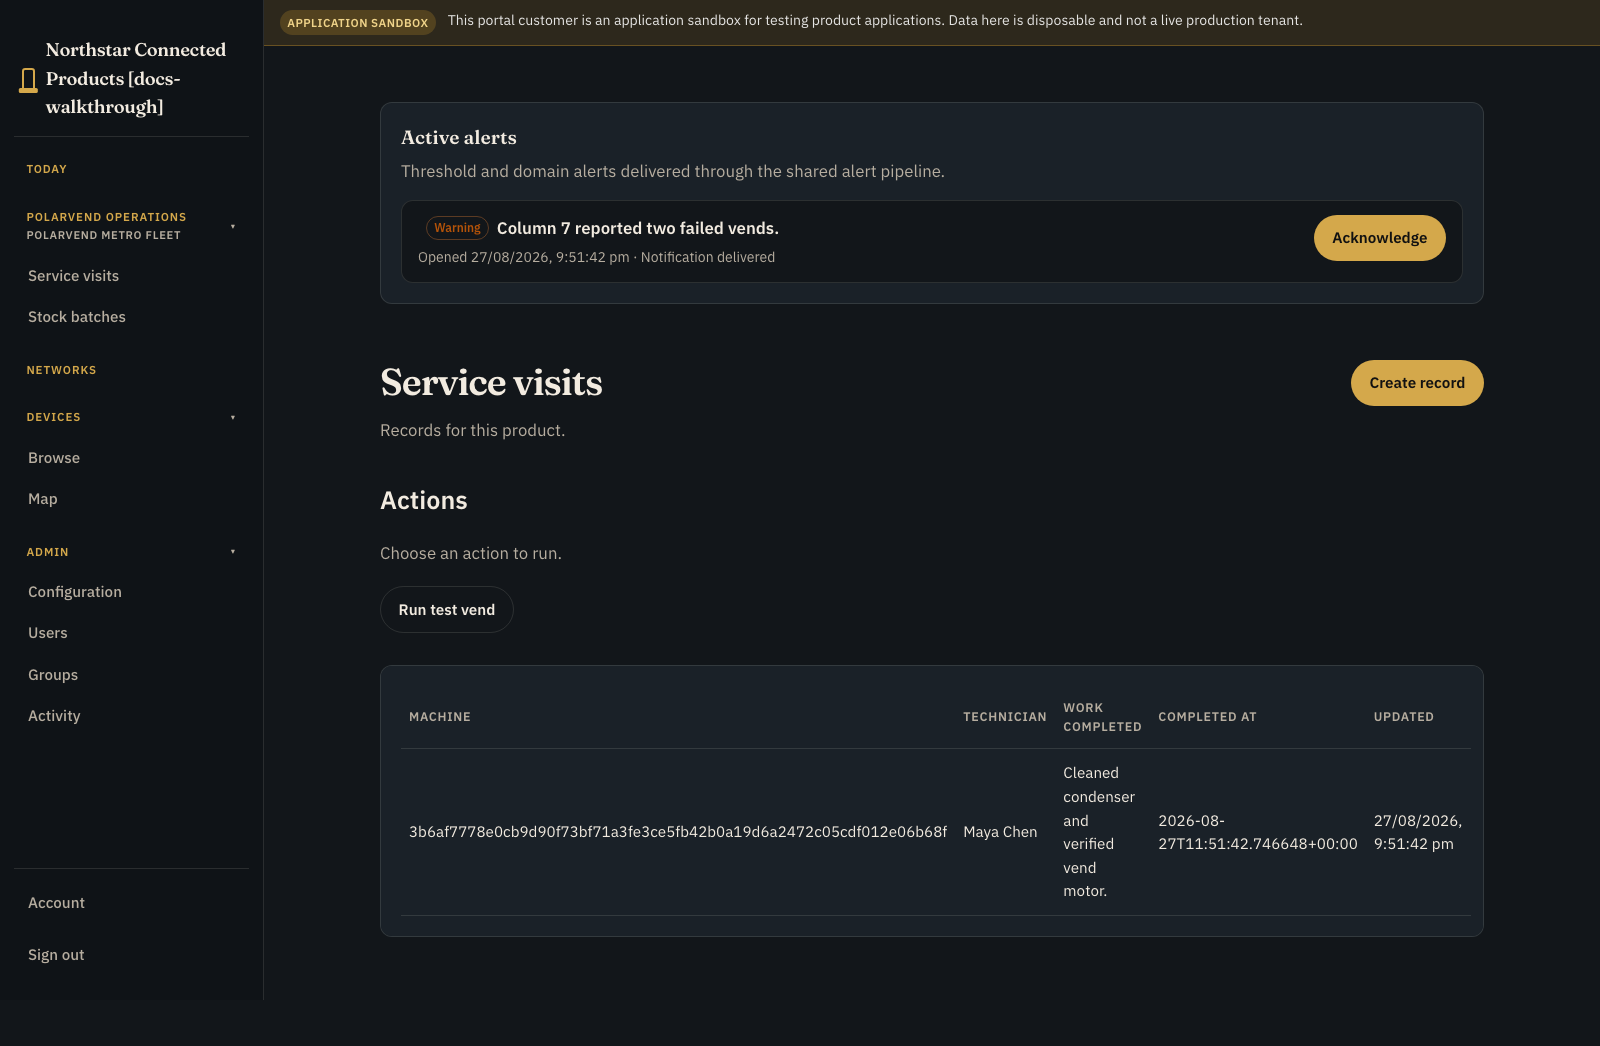
Open the PolarVend application overview. The generic landing surface brings active alerts, application actions, and the first customer record model together. Operators can read and acknowledge the failed-vend alert, run a test vend, create a service visit, or open an existing visit.
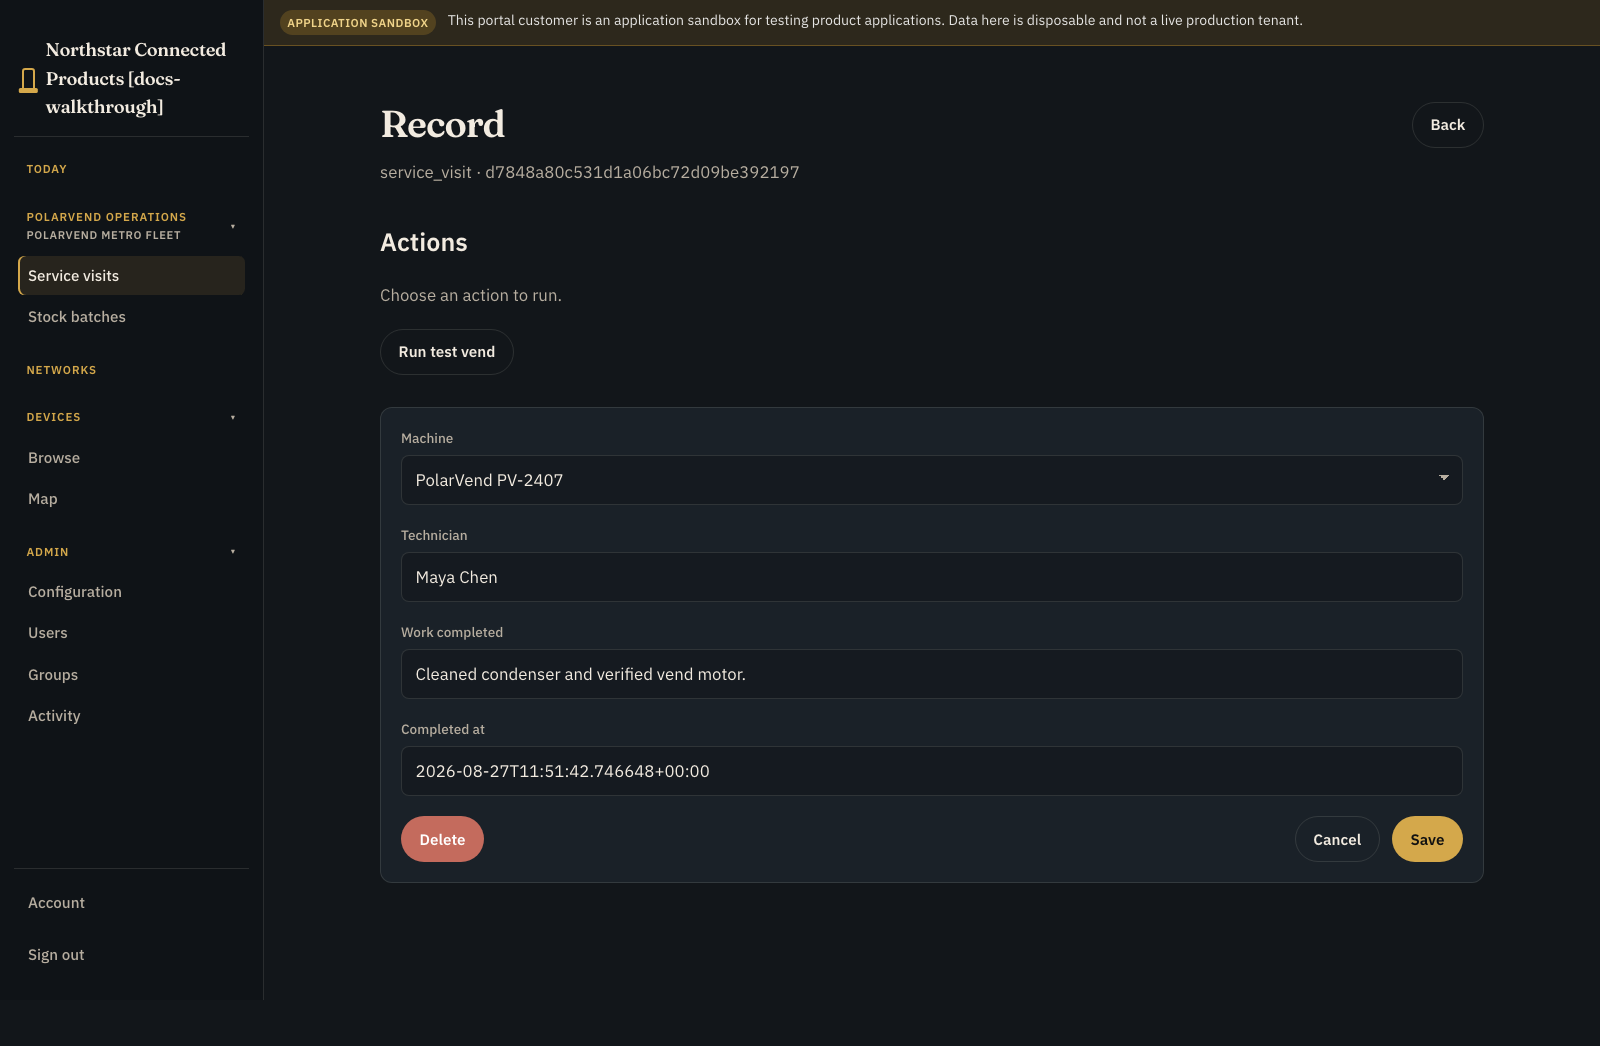
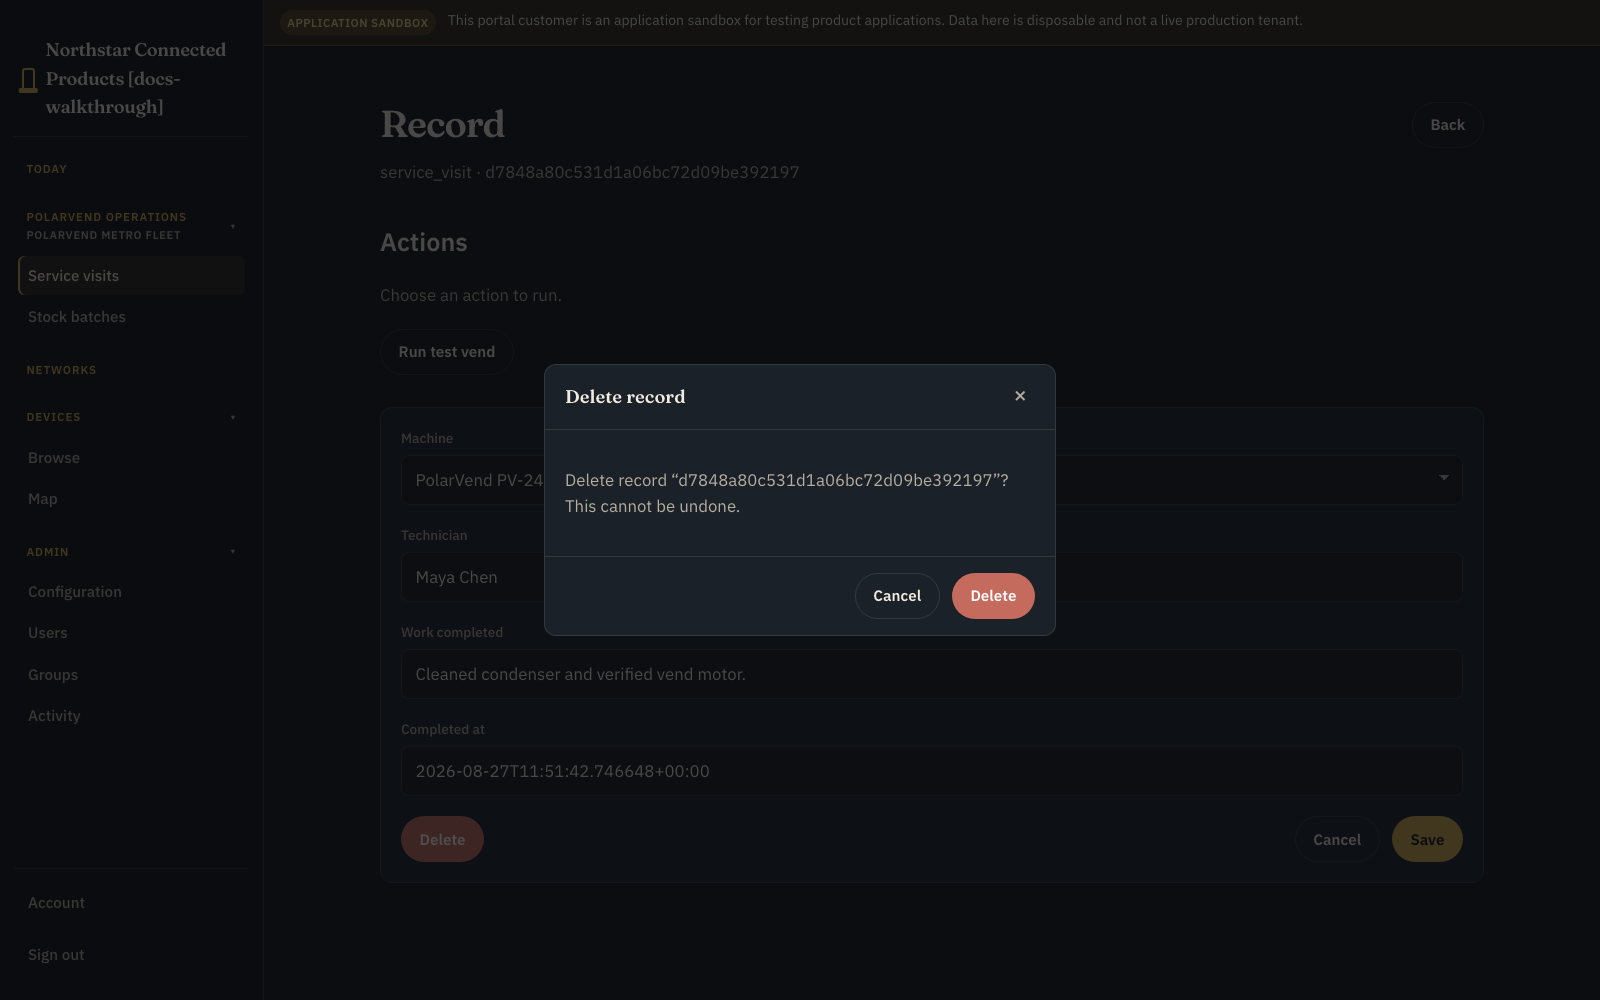
The record detail honours the model permissions configured in the application. For Service visits, customers can edit or delete; Stock batches remain non-deletable.
Device software still required #
This walkthrough proves OEM authoring and Customer Portal operation. A production PolarVend integration still needs device software that you qualify against the device data and control contract. Use this checklist when you implement the handler:
| Concern | What to prove |
|---|---|
| Streams | Publish cabinet temperature, stock remaining, and service door with stable keys and sane timestamps |
| Test vend action | Receive the action, enforce local safety, report terminal success or failure, and publish resulting stock or vend state on a stream |
| Command identity | Treat retries and duplicates as safe; do not dispense twice for one operator intent |
| Restart behaviour | Pending in-memory actions do not survive agent restart; design recovery accordingly |
| Offline behaviour | Reject or defer work when the device cannot safely act; reconcile after reconnect |
| Settings | Receive desired values via oem.setting / manifest / GET /v1/settings, apply safely, and publish reported state (POST /v1/settings/{key}/reported or the reported settings API) |
Require field agent 0.1.52+ (or a later release that documents the same local settings consumer) before you tell customers that settings widgets change physical behaviour.
What this route provides #
Your own application provides:
- the application name in customer navigation
- Device Class Controls with streams, authored settings widgets, charts, and actions
- generic customer record lists and detail forms
- permission-aware create, edit, and delete
- readable and acknowledgeable application alerts
- the standard Networks and Devices workflows
It does not add kit-specific Analysis or HVAC schedules views. Use a starter kit when the product matches one of the shipped application workplaces and you want its purpose-built models, navigation, and operating screens.