

Appearance
Turn your hardware into a customer SaaS product #
This guide is for a hardware company building a service around a connected Linux device. You begin with one working unit. You finish with:
- a repeatable product definition
- a secure connection from every device
- a customer-facing page with live product data
- a branded portal for each customer's users and sites
- a support and release process your team can operate after shipment
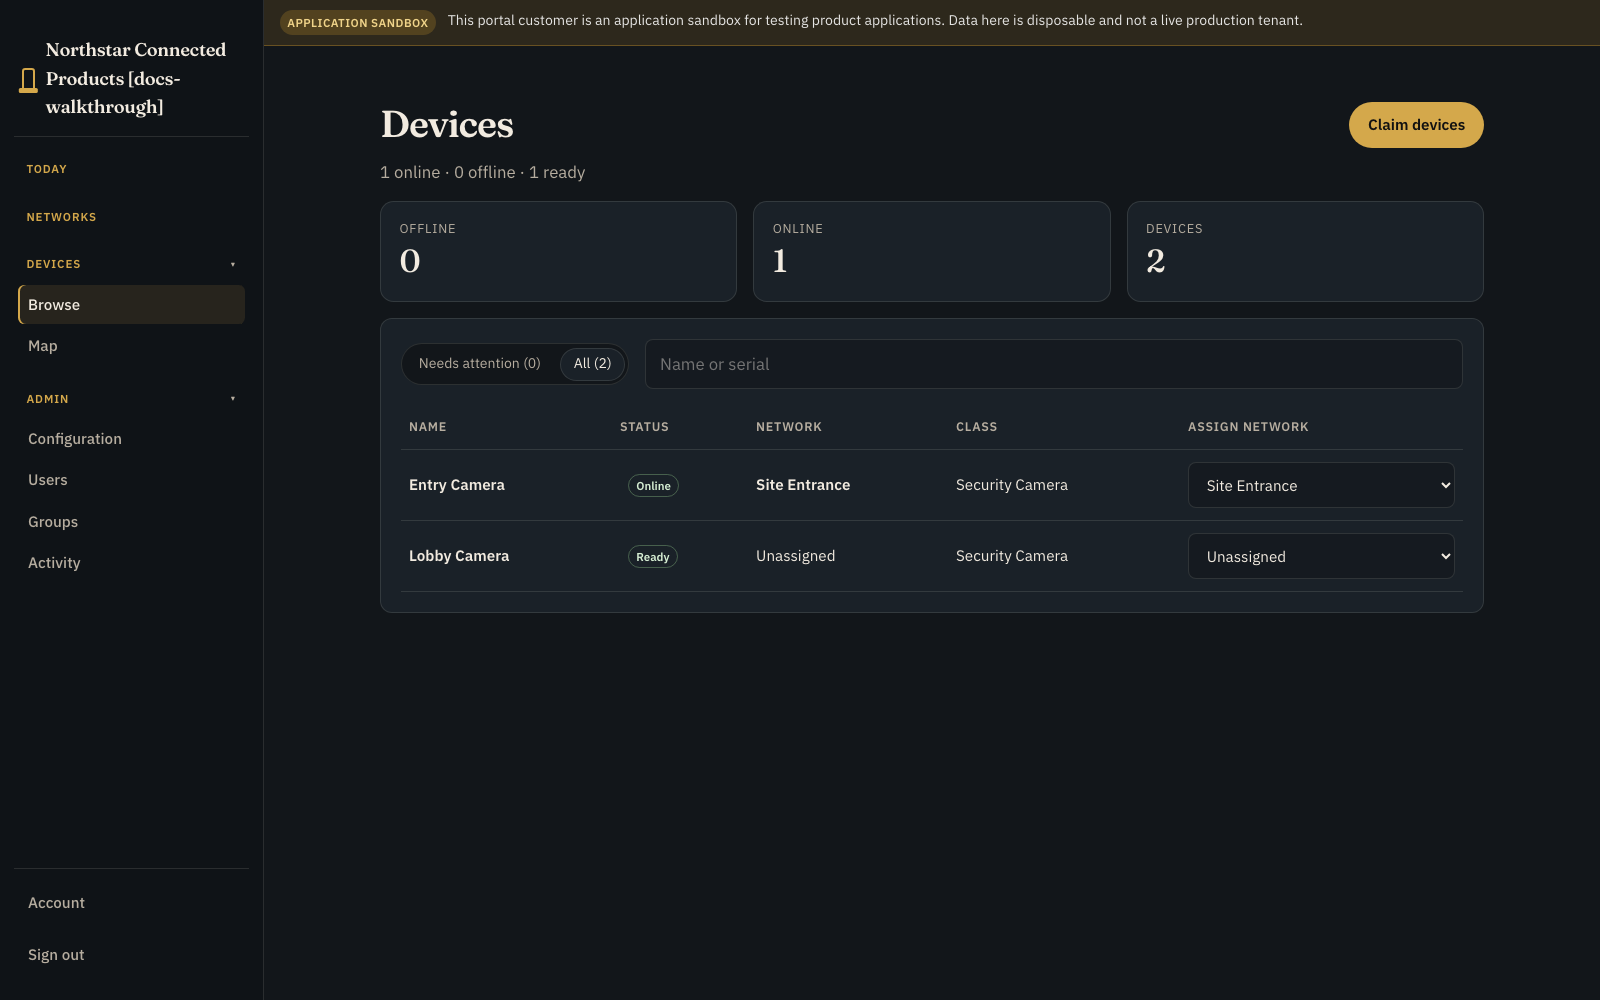
Your engineering team works in Dataplicity. Your customers use your branded portal at the permanent hosted https://your-vendor.dvcmgr.com address created for your organisation. The current OEM UI does not provide self-service custom portal hostnames. Customers do not enter your engineering workspace.
The product you will build in this guide #
Use this example to keep the roles of each part clear:
You manufacture a refrigerated-storage monitor. A customer buys monitors for two warehouses. Their operations team signs in to your portal, sees which monitors are online, opens the Bristol warehouse, and checks the temperature reported by each unit. Your support team uses the separate engineering workspace to diagnose faults and release device software.
In Dataplicity, that becomes:
| Your real-world thing | Dataplicity model | Example |
|---|---|---|
| Your company | Vendor organisation | Northstar |
| A model of hardware you sell | Device Class | Cold Room Monitor |
| One manufactured unit | Device | Monitor CRM-0042 |
| A value produced by the unit | Class stream | temperature_c |
| The page your customer opens | Class UI | Temperature, connection state, identity |
| A company that bought your product | Portal customer | Polar Freight |
| One customer location or deployment | Network | Bristol Distribution Centre |
| A person at the customer | Portal user | Bristol site operator |
Understand what Dataplicity supplies #
Dataplicity supplies the connected-product operating layer:
- device identity and outbound connection
- product classes and compatible software releases
- delivery of product values from the device
- customer and site separation
- a branded customer portal
- engineering tools for fleet operations and remote support
You still own the commercial product around it: hardware, pricing, contracts, payment collection, warranty terms, customer onboarding policy, and first-line support. The portal is the application your customer uses after they buy. It is not a storefront or a substitute for your billing system.
Confirm that your organisation has the required product access #
Do this before integrating hardware. The workflow crosses several parts of Dataplicity that are controlled by plan entitlements.
The connected-product Customer Portal suite is a supported product. Availability is controlled by the published plan and quantity entitlements. There is no beta, early-access, programme-enrolment, or release-channel gate for the basic suite.
The current package is:
- Free: connect and evaluate a device; no Customer Portal suite.
- Standard: the full basic suite for exactly one Customer Portal and one downstream customer organisation.
- Business+: unlimited portals and customer organisations, subject to published platform limits.
Ask an Organisation Administrator to open Settings, then Configuration, and confirm:
- your subscription includes the customer and engineering capabilities you intend to use
- you can open Customer journey > Customer Portal
- you can open Customer journey > Customers
- you can create a Device Class under Engineering > Device classes
- Engineering > Software > I/O and the class UI Designer are available
- Engineering > Software is available if Dataplicity will manage your device application
The current suite checks whitelabel, customers, device_class_ui, microservices, and firmware independently. Different capabilities can have different plan and role gates. Seeing Device Classes does not prove that Customer Portal, Customers, class UI, class containers, or Software Builds are enabled. Device Class Inventory is separately gated on Business+; claim bundles are separately gated to Enterprise. Product Applications are available on Standard+ without beta enrolment; the product_applications capability is the plan/access entitlement check for that surface.
If one of these surfaces is absent, resolve access with your Organisation Administrator before continuing. Do not design a delivery process around a control that your production organisation cannot use.
Before you configure anything #
Write down these decisions for one product and one customer:
- Product: which hardware model are you selling?
- Customer job: what should a customer be able to learn or do?
- Product data: which readings or states are required for that job?
- Deployment unit: does a network represent a site, vehicle, cabinet, or another customer boundary?
- Support boundary: what can the customer do, and what remains restricted to your engineering team?
For the cold-room monitor, the first version might promise only:
- see all monitors at each warehouse
- know whether each monitor is connected
- read the current temperature
- identify the physical unit when calling support
That is enough for a first sellable service. Add alerts, charts, remote actions, and automation only after the basic path works end to end.
Learn the complete path without waiting for hardware integration #
If your device application or sensor driver is not ready, use an example simulator first. It exercises the same Containers, Builds, I/O, stream, and UI Designer path with generated values.
Use the simulator to learn Dataplicity. Replace the generated value with your hardware adapter only after you can follow one value from the device to the customer page.
The build path #
Complete these milestones in order:
| Milestone | You have succeeded when |
|---|---|
| 1. Connect one unit | Representative hardware appears online in Dataplicity |
| 2. Define the product | The unit belongs to the correct Device Class |
| 3. Publish one value | A real reading reaches its class stream |
| 4. Build the product page | A non-engineer can understand the unit's state |
| 5. Create the customer boundary | A customer, network, and portal user exist |
| 6. Hand over one unit | The customer can open only their assigned device |
| 7. Make it repeatable | Manufacturing, release, support, and offboarding are tested |
Do not begin with a fleet. Prove every milestone with one staging device, one test customer, and one customer-scoped user.
1. Connect one representative device #
Use the same hardware architecture and operating-system image that you intend to ship.
- Sign in to your Dataplicity engineering workspace.
- Open Engineering > Devices, choose Add a new device, and copy the supplied install command.
- Run it on the staging device.
- Confirm the device appears in inventory and becomes online.
- Reboot the device and confirm it reconnects without manual intervention.
At this point you have secure device connectivity and engineering access. You do not yet have a customer product.
If the device cannot connect, stop here and use the first-device guide and firewall requirements.
2. Define the hardware product #
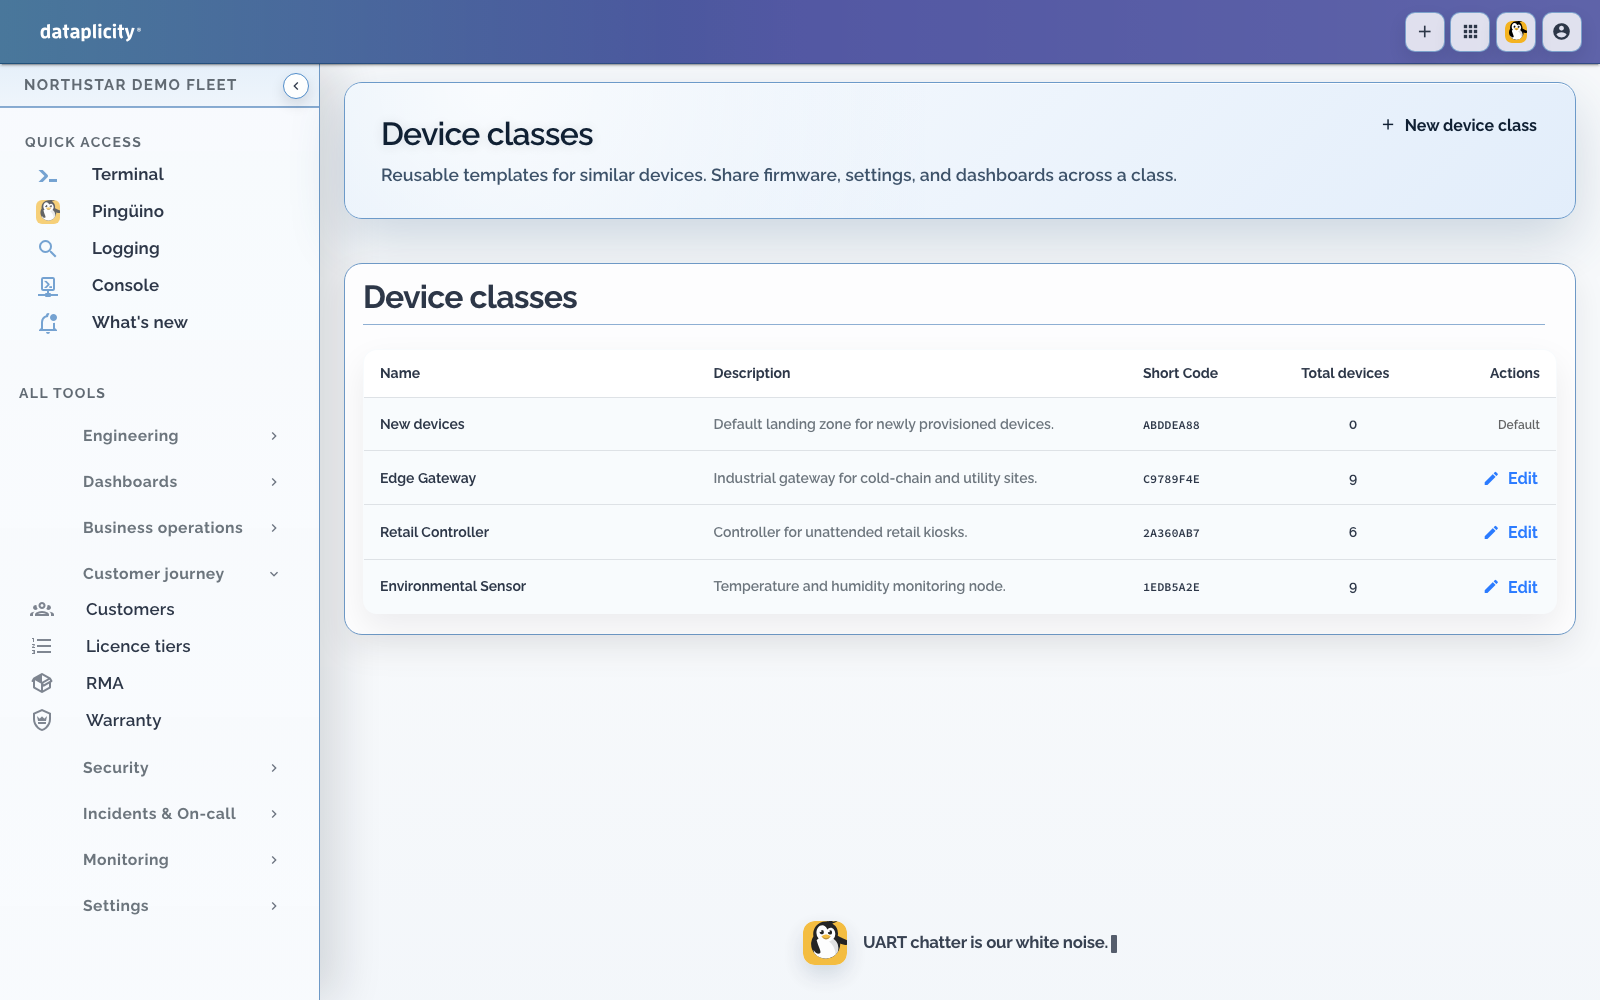
A Device Class is the model of hardware you sell. It is not a customer, site, or temporary group.
Create one class for the cold-room monitor and record:
- a customer-readable product name
- the single CPU architecture, which becomes permanent when first saved
- whether you manage the complete appliance or install beside a customer's OS
- the hardware profile and capabilities
- the software and page configuration shared by every unit of this model
Assign the staging device to this class. Do not use one class for unrelated models simply because they report similar data. The class becomes a durable product contract used by provisioning, software, streams, page layouts, and potentially licensing.
3. Decide how your device application runs #
Dataplicity does not require you to rewrite the application already controlling your hardware. Choose one path:
| Starting point | What to do |
|---|---|
| Existing systemd service, Docker workload, Greengrass component, balena service, or supervisor | Keep it and add a small publisher that sends selected product values to the local Dataplicity broker |
| No suitable application runtime yet | Start from a Dataplicity example container, replace the simulated input with your hardware adapter, and let Software install and version it |
| Connectivity and inventory are enough for version one | Skip product streams and managed Software; the portal can still show identity, assignment, and connection state |
The customer portal does not require a Dataplicity-managed container. Managed Software is useful when Dataplicity should install and release an OCI image across this product line.
If you choose Dataplicity-managed container software:
- Open Engineering > Software and select the Device Class.
- Under Containers, attach a managed example or your organisation-owned container.
- Configure its parameter schema and class overrides.
- Upload and test the OCI version.
- Under Builds, compose exact container versions and an optional OS image.
- Select the Build as the class default or assign it to a staging cohort.
- If the Build contains an OS image, start its staged rollout under Delivery.
See Configure container software for ownership, OCI versions, and parameters, then Software Builds and cohorts for release targeting. Use an example simulator if real sensor integration is not ready. Keep the application container, Software Build, agent, OS, and physical firmware boundaries explicit in the release plan.
4. Turn a hardware reading into product data #
A customer page cannot consume an arbitrary process variable. Give each customer-facing value a stable product contract.
For the cold-room monitor:
| Meaning | Stream ID | Type | Unit |
|---|---|---|---|
| Current air temperature | temperature_c | Number | °C |
| Door state | door_open | Boolean | n/a |
| Temperature outside the configured range | temperature_alarm | Boolean | n/a |
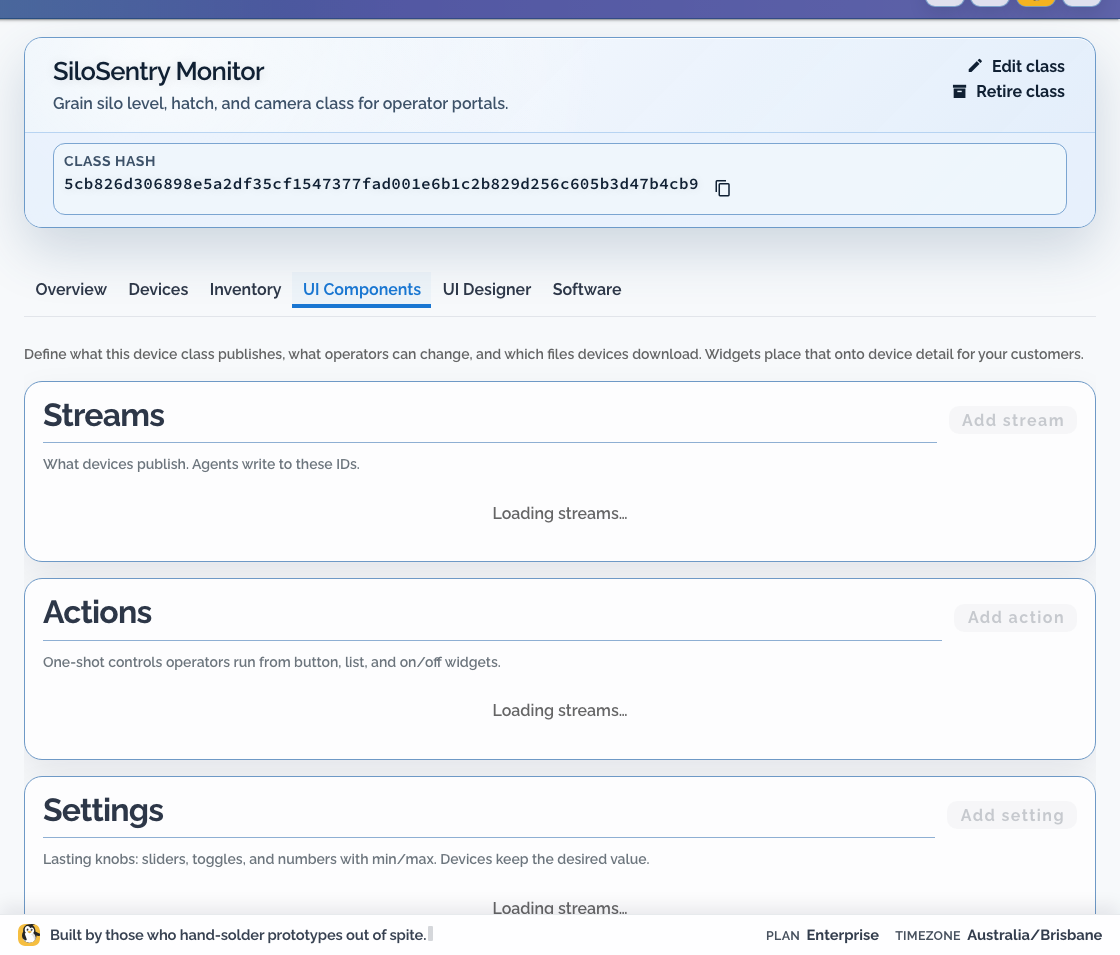
Under Engineering > Software > I/O, select the Device Class:
- choose Add stream
- enter the stable ID
- give it a customer-readable Name
- select its Data type and Unit
- enable history only where the customer experience needs it
Your on-device application posts readings to the agent's loopback broker. The agent authenticates and delivers them to Dataplicity:
text
hardware sensor
  -> your device application
  -> local agent broker (`temperature_c = 4.2`)
  -> Dataplicity
-> customer device pageThe application does not need a Dataplicity cloud API key. Keep stream IDs stable after shipment; they are the API between your device software and the customer page.
Follow Device class streams to publish and verify the first sample. Before production, implement and test the complete device data and control contract, including version qualification, rate handling, restart, offline, stale, and duplicate behaviour.
5. Build the page your customer is buying #
Do not start by adding every available widget. Start with the customer's job. For a cold-room operator, the page should answer:
- Which physical monitor is this?
- Is it connected now?
- What temperature is it reporting?
- Is the reading normal or actionable?
- Which warehouse contains it?
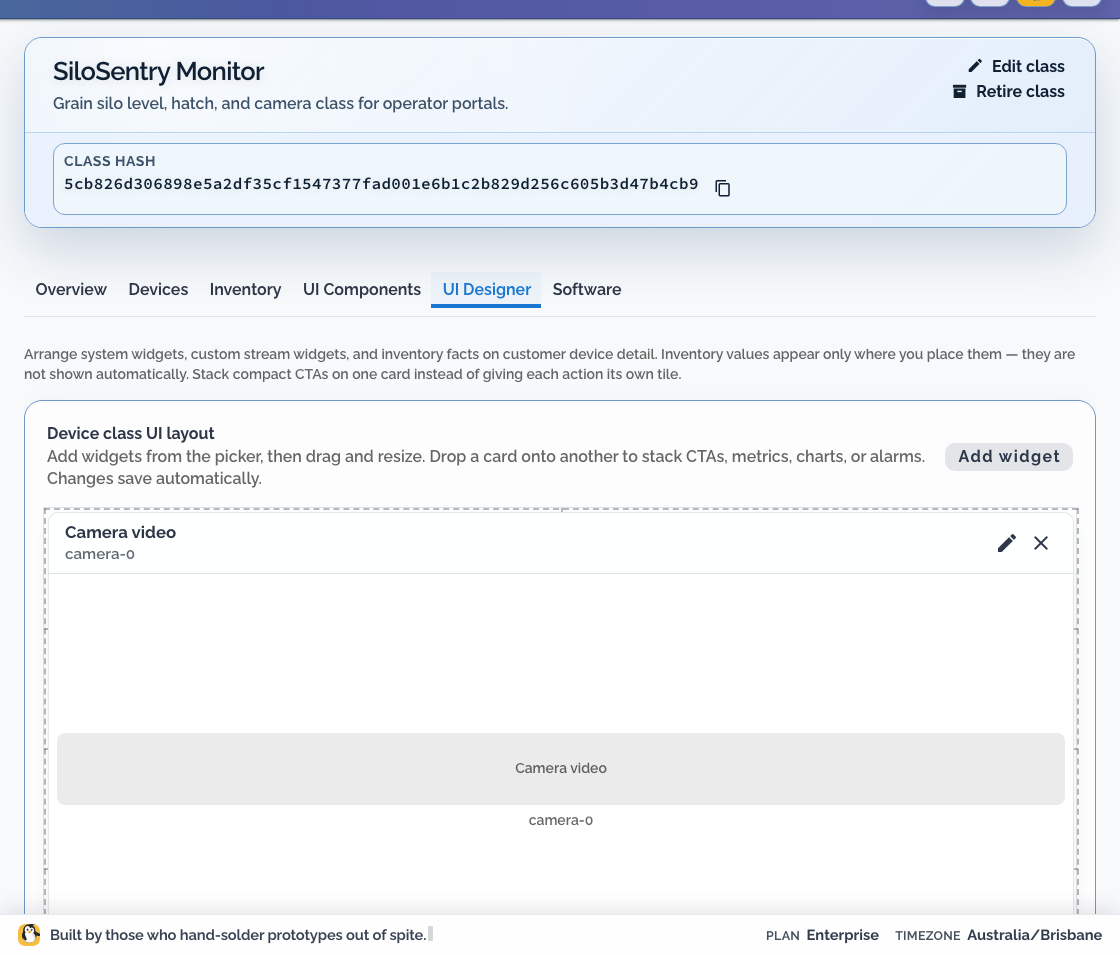
Open the Device Class UI Designer and:
- add identity and connectivity context
- add a metric widget for
temperature_c - add explicit state for
temperature_alarmrather than asking the customer to interpret a raw number - arrange the page in the order the customer diagnoses a problem
- preview current, missing, stale, and offline states
- save the class layout
Keep Remote Shell, fleet-wide logs, firmware rollout, and engineering diagnostics out of this page. Those remain in your engineering workspace.
See Design a device class page for widget and state design.
6. Create the branded customer service #
Open Customer journey > Customer Portal. Create the portal before you create customer accounts:
- Choose the hosted Subdomain carefully. It is the permanent tenant address and cannot be renamed later.
- Enter the customer-facing Portal title.
- Turn on Enable customer portal.
- Use Edit branding to configure logos and colours.
- Configure the sign-in, portal, and support copy.
- Use Open live preview before inviting anyone.
Then open Customer journey > Customers and model the buyer:
- Choose Add customer.
- Enter the Organization name and the first Org admin email.
- Grant access to the intended Customer Portal.
- In the customer portal, create a Network for each site or deployment boundary they should operate.
- Invite operator and read-only test users as needed.
- Assign the smallest role and network scope that supports each person's job.
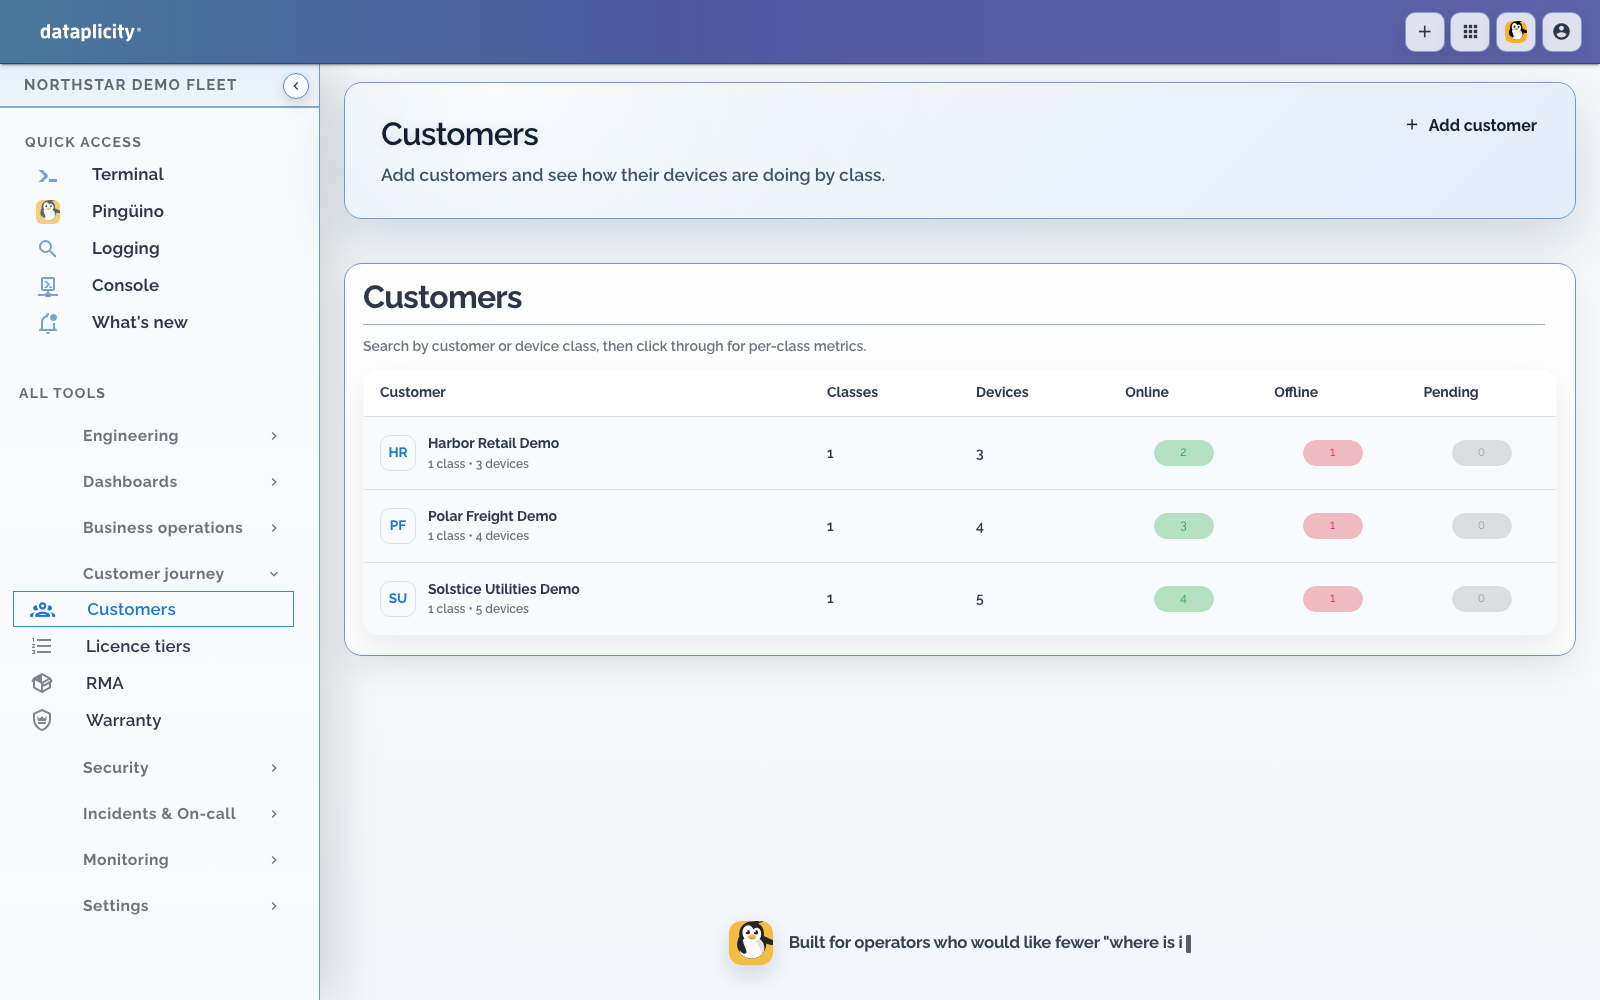
For the example:
- portal customer: Polar Freight
- networks: Bristol Distribution Centre and Leeds Cold Store
- user: a Polar Freight operator, not a member of your OEM engineering team
Customer separation is part of the product. A network groups a customer's devices. A Device Class describes the model of hardware. Do not use classes as customer boundaries or grant customers OEM roles.
In the current portal, network assignment is the technical placement step that makes a claimed device active. The name need not describe a literal computer network: model the customer-facing concept as a warehouse, farm, vehicle, cabinet, or other operating location, and explain that meaning consistently in your onboarding.
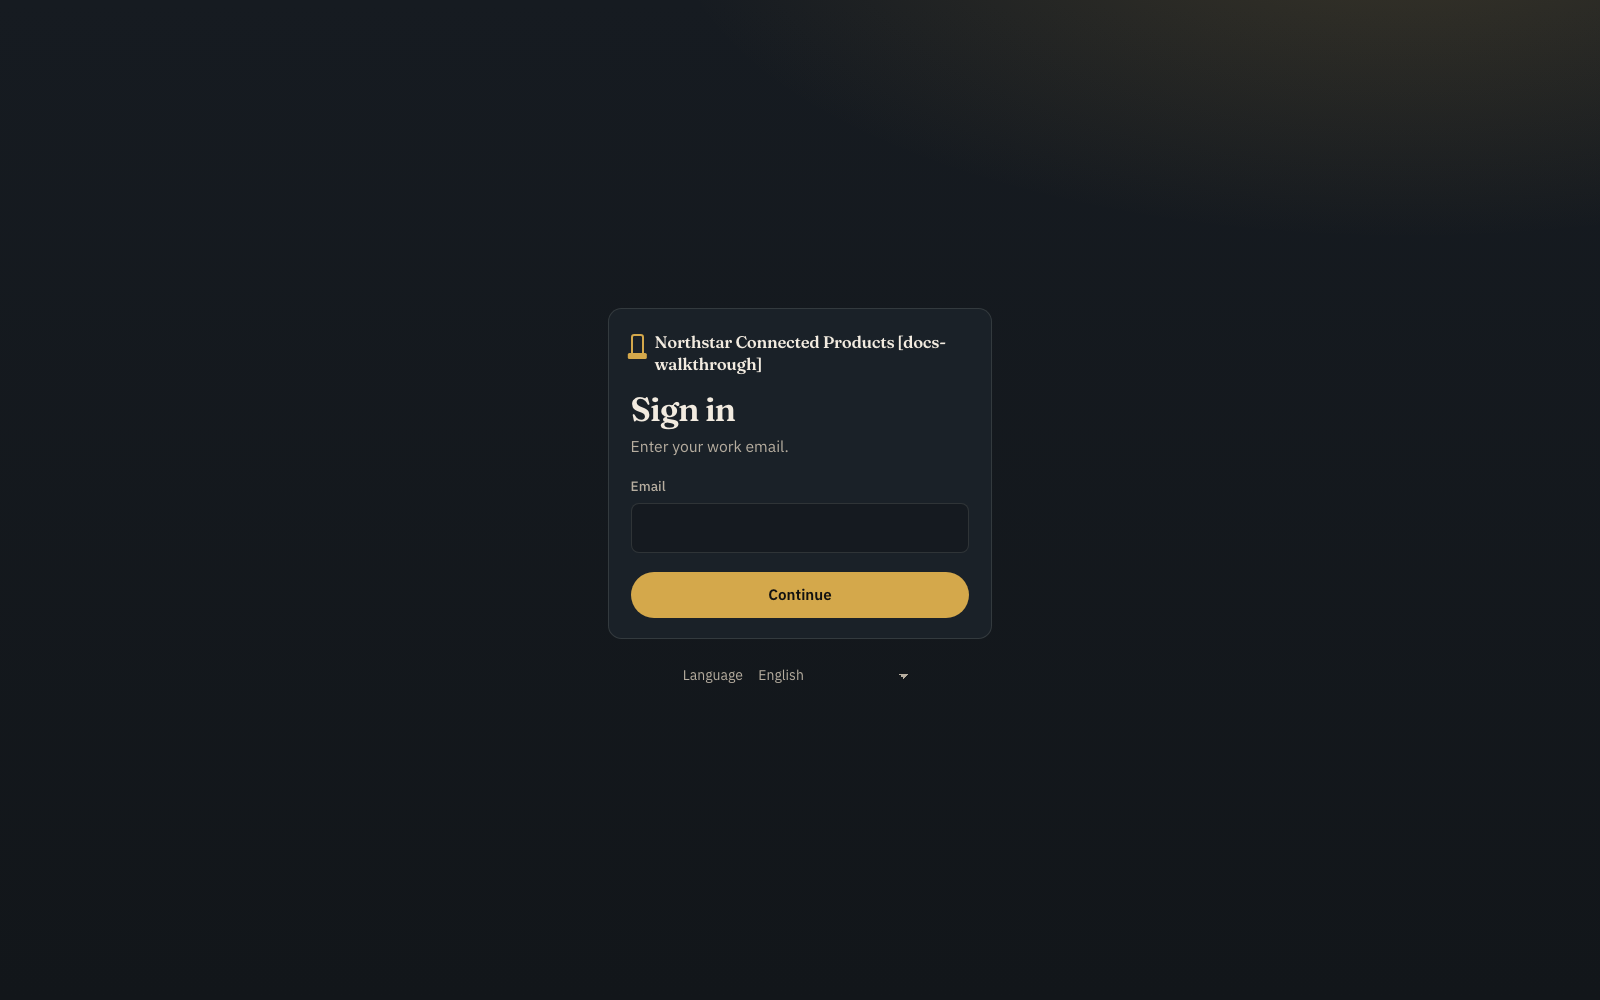
Read Customer portal for the portal navigation, role boundary, and operator pages.
In the customer portal, Today, Networks, Devices, and the role-gated Admin group are the only primary navigation areas. Account contains the signed-in identity; the sidenav footer does not repeat the email. Password, authenticator-app, and passkey changes open focused modals from Account > Security. Under Admin > Configuration, the This organisation section identifies the customer boundary being edited.
7. Onboard the first customer device #
Use one staging unit to rehearse the exact handoff you will perform after a sale:
- Confirm the device has the intended identity and Device Class in your engineering workspace.
- For a staff-managed first delivery, open Engineering > Devices and choose Allocate to customer.
- For a customer self-service shipment, create a claim bundle and securely provide its code and auth key. Claim bundles have separate feature, plan, and permission requirements.
- As the customer Org owner or Admin, open Devices. An online, unassigned unit is Ready; assign it to the correct Network to make it Enabled and app-active at that place.
- Sign out of the engineering workspace.
- Sign in through the branded portal as the customer-scoped test user.
- Open Devices and confirm the unit appears with the intended Ready or Enabled state.
- Open Networks, choose the customer place, and confirm its online count and native application workplace where one is attached.
- Open the device. Verify vendor UI and permitted device-specific work on Controls, identity and connection context on Status, and connection tests on Diagnostics. Rename and removal actions are in the ⋮ menu, not an Admin tab.
- Confirm no other customer, network, device, or engineering control is visible.
A claimed online device that has not been assigned to a network is Ready, not broken. It is not app-active until it becomes Enabled through network placement. Make that assignment an explicit step in fulfilment.
Allocation also changes the support boundary. If your engineers must continue opening customer-allocated devices, an Organisation Administrator must review Settings > Configuration > Allocated device access. Enable it only when your support agreement and access policy require that capability.
8. Turn the prototype into a repeatable service #
One working portal device proves the design, not the business process.
Manufacturing and commissioning #
- install the agent through a controlled image or first-boot process
- give every physical unit its own Dataplicity identity
- assign the correct Device Class automatically or through a checked procedure
- retain a manufacturing asset ID that links the physical label to the device record
- protect provisioning material from public images, logs, and source control
Software release #
- test application-container changes on staging hardware
- verify the target architecture
- create a Build containing exact released versions
- roll out to a bounded cohort before the whole fleet
- start and review Delivery separately when the Build includes an OS image
- preserve compatibility when changing stream IDs or page layouts
Customer fulfilment #
- create the customer and networks from the signed order or authoritative CRM record
- assign serialised devices to the correct customer
- invite named users rather than sharing accounts
- provide portal, support, warranty, and escalation information
- rehearse replacement, reassignment, return, and decommissioning
Operations and support #
- monitor device connectivity and the product signals that affect customers
- collect the logs your support team needs before the first incident
- define who handles a customer report and who may use engineering access
- test recovery after network loss, reboot, and stopped application publishing
- keep customer communication separate from engineering-only evidence
Use Installing for mass production and Production rollout to build this operating process.
Launch gate for a sellable first version #
Do not onboard a real customer until all of these are true:
Product #
- [ ] A representative unit reconnects after power and network loss.
- [ ] Every unit resolves to the intended Device Class.
- [ ] The device application resumes publishing after interruption.
- [ ] The publisher contains no Dataplicity API key.
- [ ] Customer values use stable IDs, correct units, and understandable states.
- [ ] The released software matches the device architecture.
Customer experience #
- [ ] Branding, domain, sign-in, and support links are correct.
- [ ] A new device can be assigned to the right customer and network.
- [ ] The customer page distinguishes offline, missing, stale, and abnormal.
- [ ] A customer user sees only their own customer, networks, and devices.
- [ ] Viewer and operator roles expose only their intended actions.
- [ ] No engineering-only control appears in the portal.
Business operations #
- [ ] Sales or fulfilment provides an authoritative customer and site record.
- [ ] Manufacturing records the physical asset-to-device identity.
- [ ] Support can find a unit from the information printed on it.
- [ ] Your team has tested software rollout, replacement, reassignment, and decommissioning.
- [ ] Pricing, invoicing, warranty, support, and data responsibilities are documented outside the portal.
Related #
- Connect your first device
- Connected-product company workflow
- Device classes
- Build a class container
- Software workspace
- Configure container software
- Software Builds and cohorts
- Software delivery
- Software and firmware boundaries
- Device data and control contract
- Device class streams
- Design a device class page
- Example simulators
- Choose a customer surface
- Complete camera and CCTV walkthrough
- Complete level-monitor walkthrough
- Complete numeric-telemetry walkthrough
- Expand devices already online beyond remote access
- Customer portal
- Product Applications
- Teams and roles
- Provision and claim
- Installing for mass production
- Production rollout
- Customer lifecycle and automation
- Production limits and service behaviour
- Ship the first customer unit you can still support
- Hand support to a real queue
- Keep your runtime